
HOW TO BE ALONE AT THE RAINBOW MOUNTAIN?
This was one of the most beautiful hikes in Peru, along with the Huayhuash. 4 incredibly magnificent days around Ausangate with an arrival at the rainbow mountain, Vinicunca, at sunrise! The best way to be the first to admire this natural beauty! And honestly, it’s totally worth it! There are several possibilities to do the Ausangate, either you do the complete tour in about a week and finish on the rainbow mountain, or you can do part of the Ausangate finishing in the same place. Traveling alone and having suffered from altitude sickness in my previous hikes, I chose to go with an agency. Because yes, the hike’s at high altitude, you’re always above 4,000 m, or even at the end 5,200 m. As the Ausangate trek isn’t yet very popular, in low season it’s difficult to find agencies that do it over several days. Fortunately, by planning a little in advance, I was able to do it in collaboration with AB Expeditions in 4 days. It’s entirely possible to do this independently. Packing up the Pieces tells you about it in this article.
WHAT EQUIPMENT TO TAKE FOR THE AUSANGATE TREK?
If you go with AB Expeditions, during your briefing, they’ll give you a bag where you can put all your stuff. This bag’s sufficient for the 4 days of hiking in Peru and it will be carried by the mules throughout the Ausangate trek.
Here’s a list to help you know what equipment to bring:
- Underwear for 4 days
- Hiking pants
- Pants for the evening and night
- T-shirts for 4 days
- A t-shirt for the evening and night
- A warm sweater for cool evenings and nights
- Warm leggings to wear under hiking pants
- A waterproof jacket for rain and wind
- A pair of hiking shoes
- A pair of shoes for the evening
- A backpack that you keep with you during the day
- Solar cream
- Cap
- Sunglasses
- A pair of gloves
- A hat
- Hiking poles if you use them
- A sleeping bag for cold temperatures (ideally -10° C)
- Your toiletries
- Cleaning wipes because there’s no shower
- A filter bottle
- Your emergency kit first aid kit / medication
- A roll of toilet paper
- Mosquito repellent
- Snacks
- Pocket money
- Your passport
- Cables to charge your devices
- A portable battery
With all this material, you’ve the basic equipment you need for the Ausangate trek. Obviously to be adjusted according to your needs and desires.
HOW TO DO THE AUSANGATE TREK?
As I said in the introduction, I went in collaboration with AB Expeditions for 4 days and 3 nights. When I booked, the agency asked that we come see them the day before for a 30-minute brief if possible. I meet my guide and he explains to me what to expect, the route, the weather, the pace, my level… A very good exchange and this allows him to adapt the trek Ausangate according to the customers he has. I liked that it was quite flexible depending on the wishes of the group.
DAY 1: 11 km - 350 m elevation gain
SUNSET AT LAKE UPIS
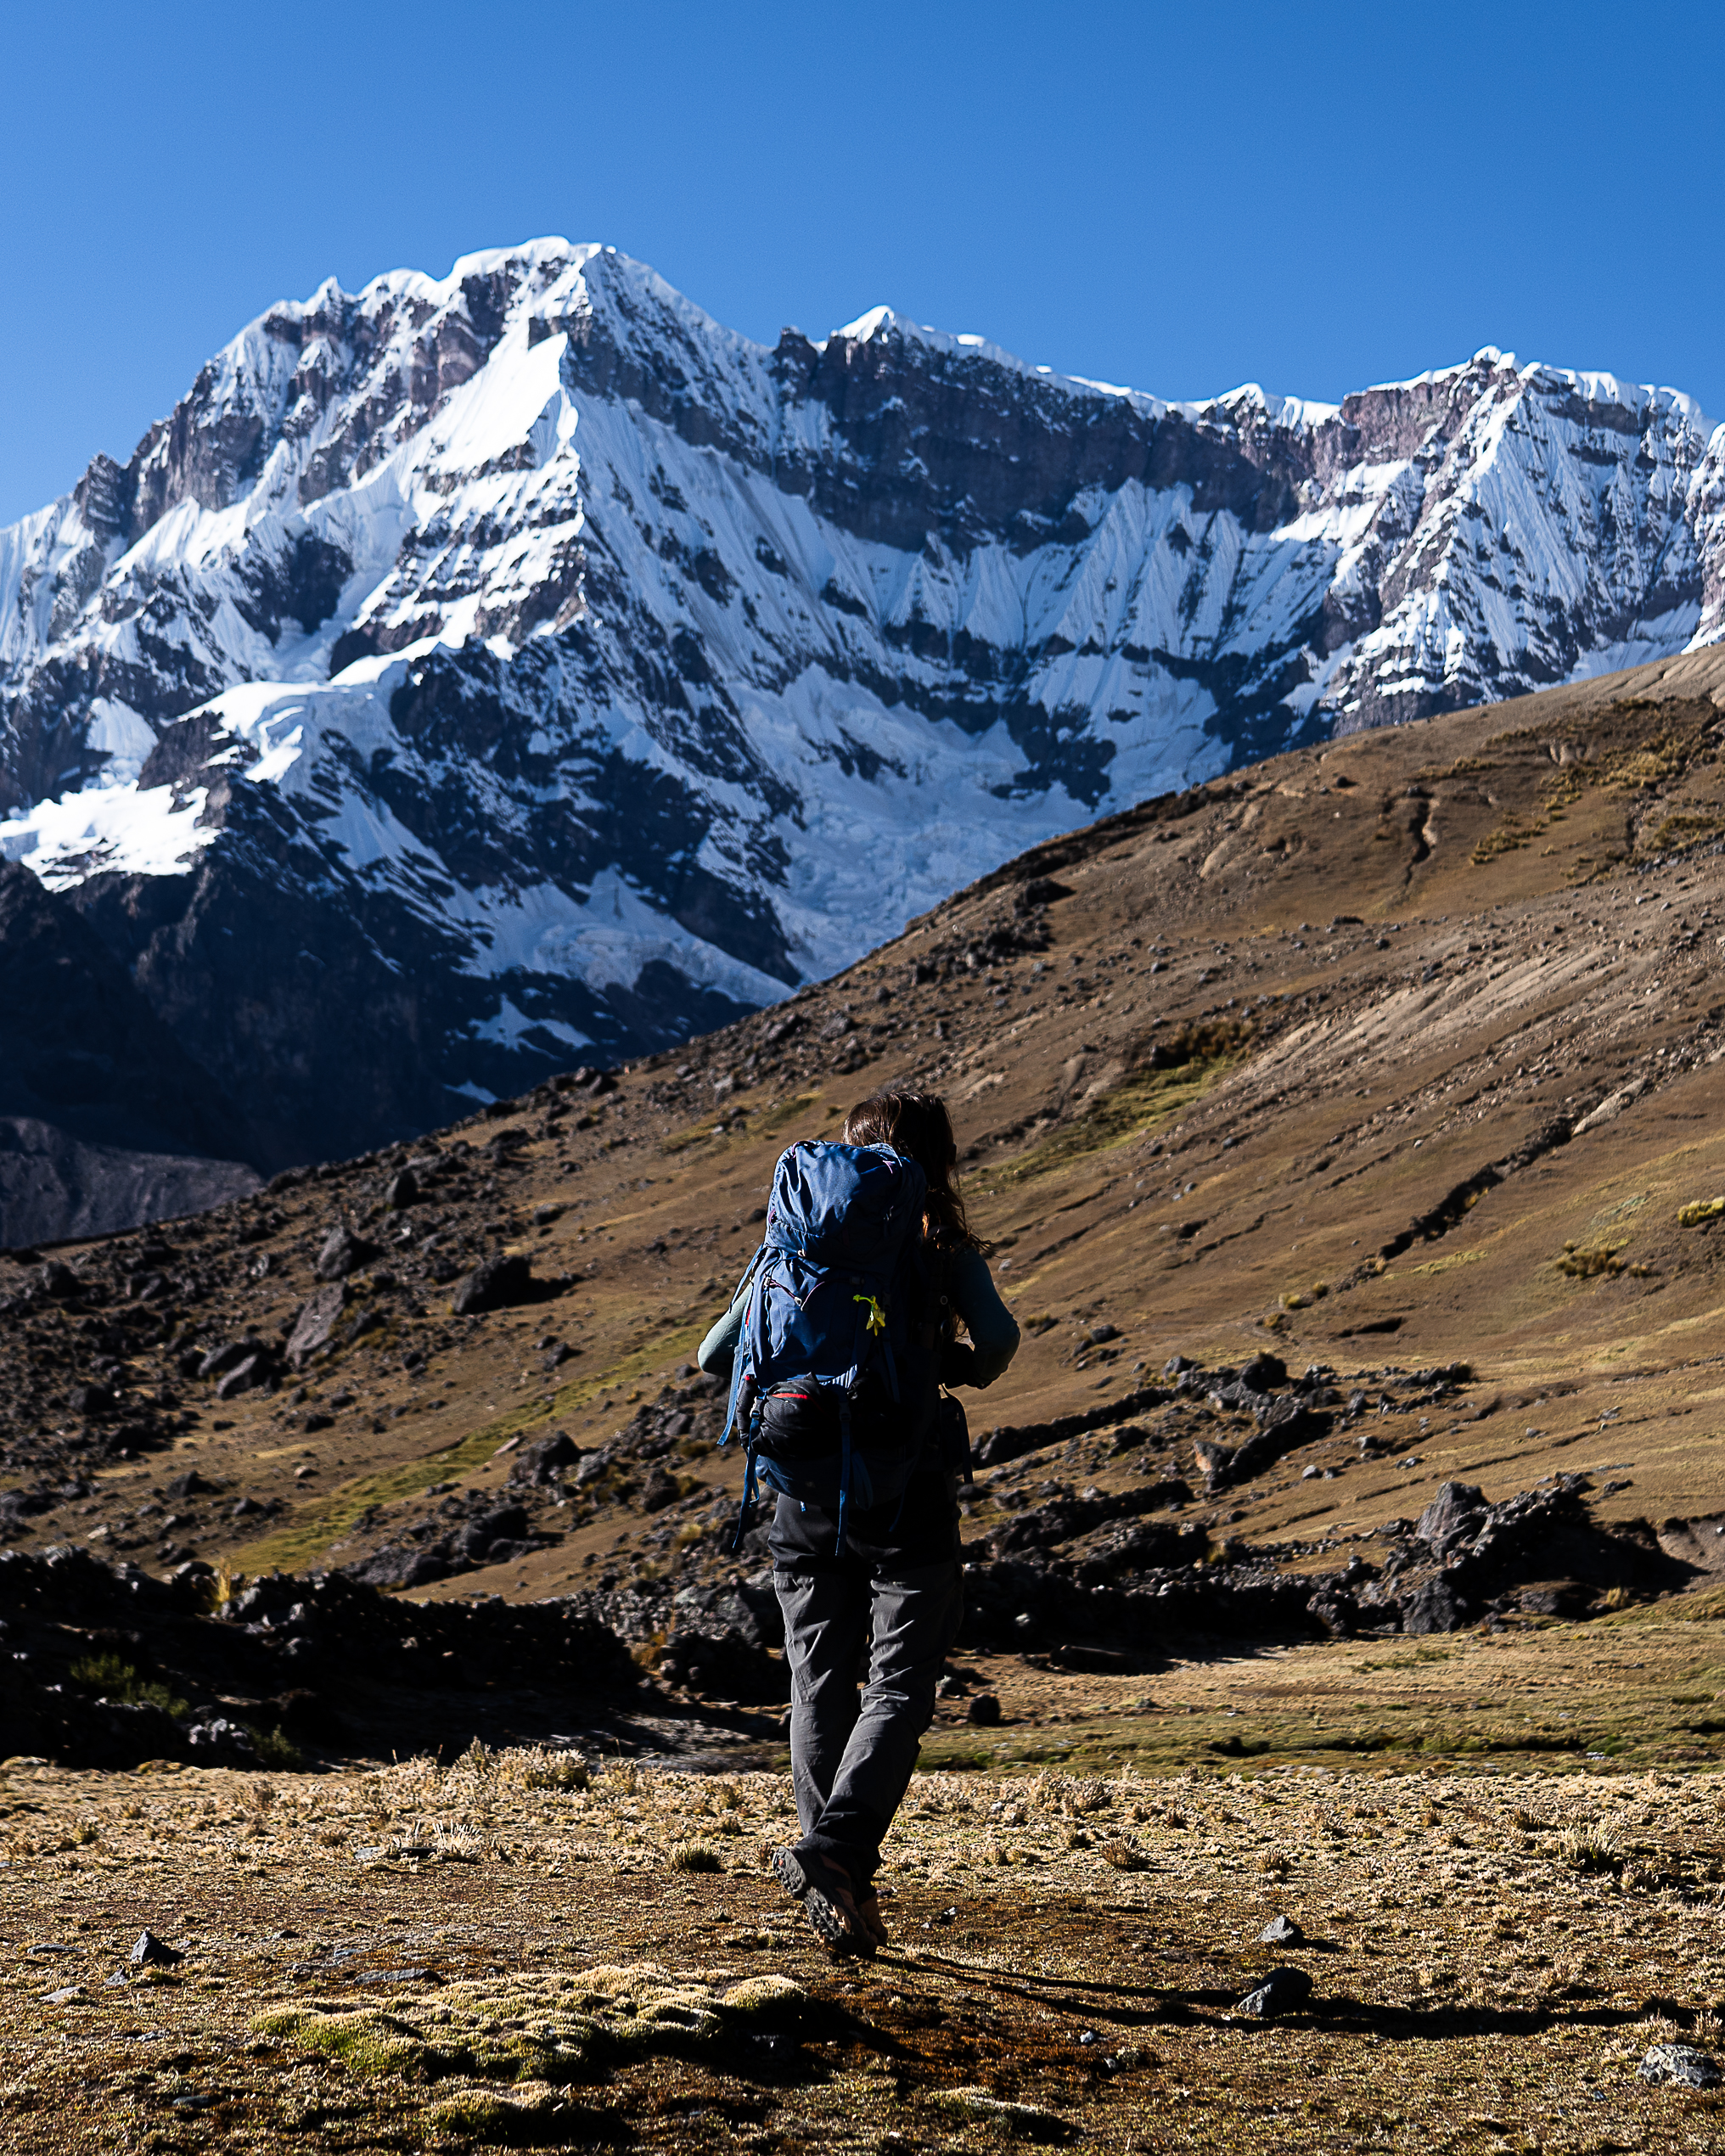
Meeting at 6am at my accommodation to wait for the guide to pick me up. I board a mini-van with 3 other people. It’s a 3.5 hour drive with a few logistical stops along the way. We arrive around 10:30 a.m. at our starting point. A small house in front of which we eat a good, very complete breakfast (avocado, hot drink, egg, cheese, and so on). After a 1 hour break, and having prepared our things, we begin the first part of the Ausangate trek, going to the Upis camp, located at an altitude of 4,320 m. It takes us about 3 hours to get there. The trail’s quite flat, which is rare for a hike in Peru haha. The landscape’s super beautiful, we can see the Ausangate closer and closer. This first day is mainly for us to acclimate to the altitude.
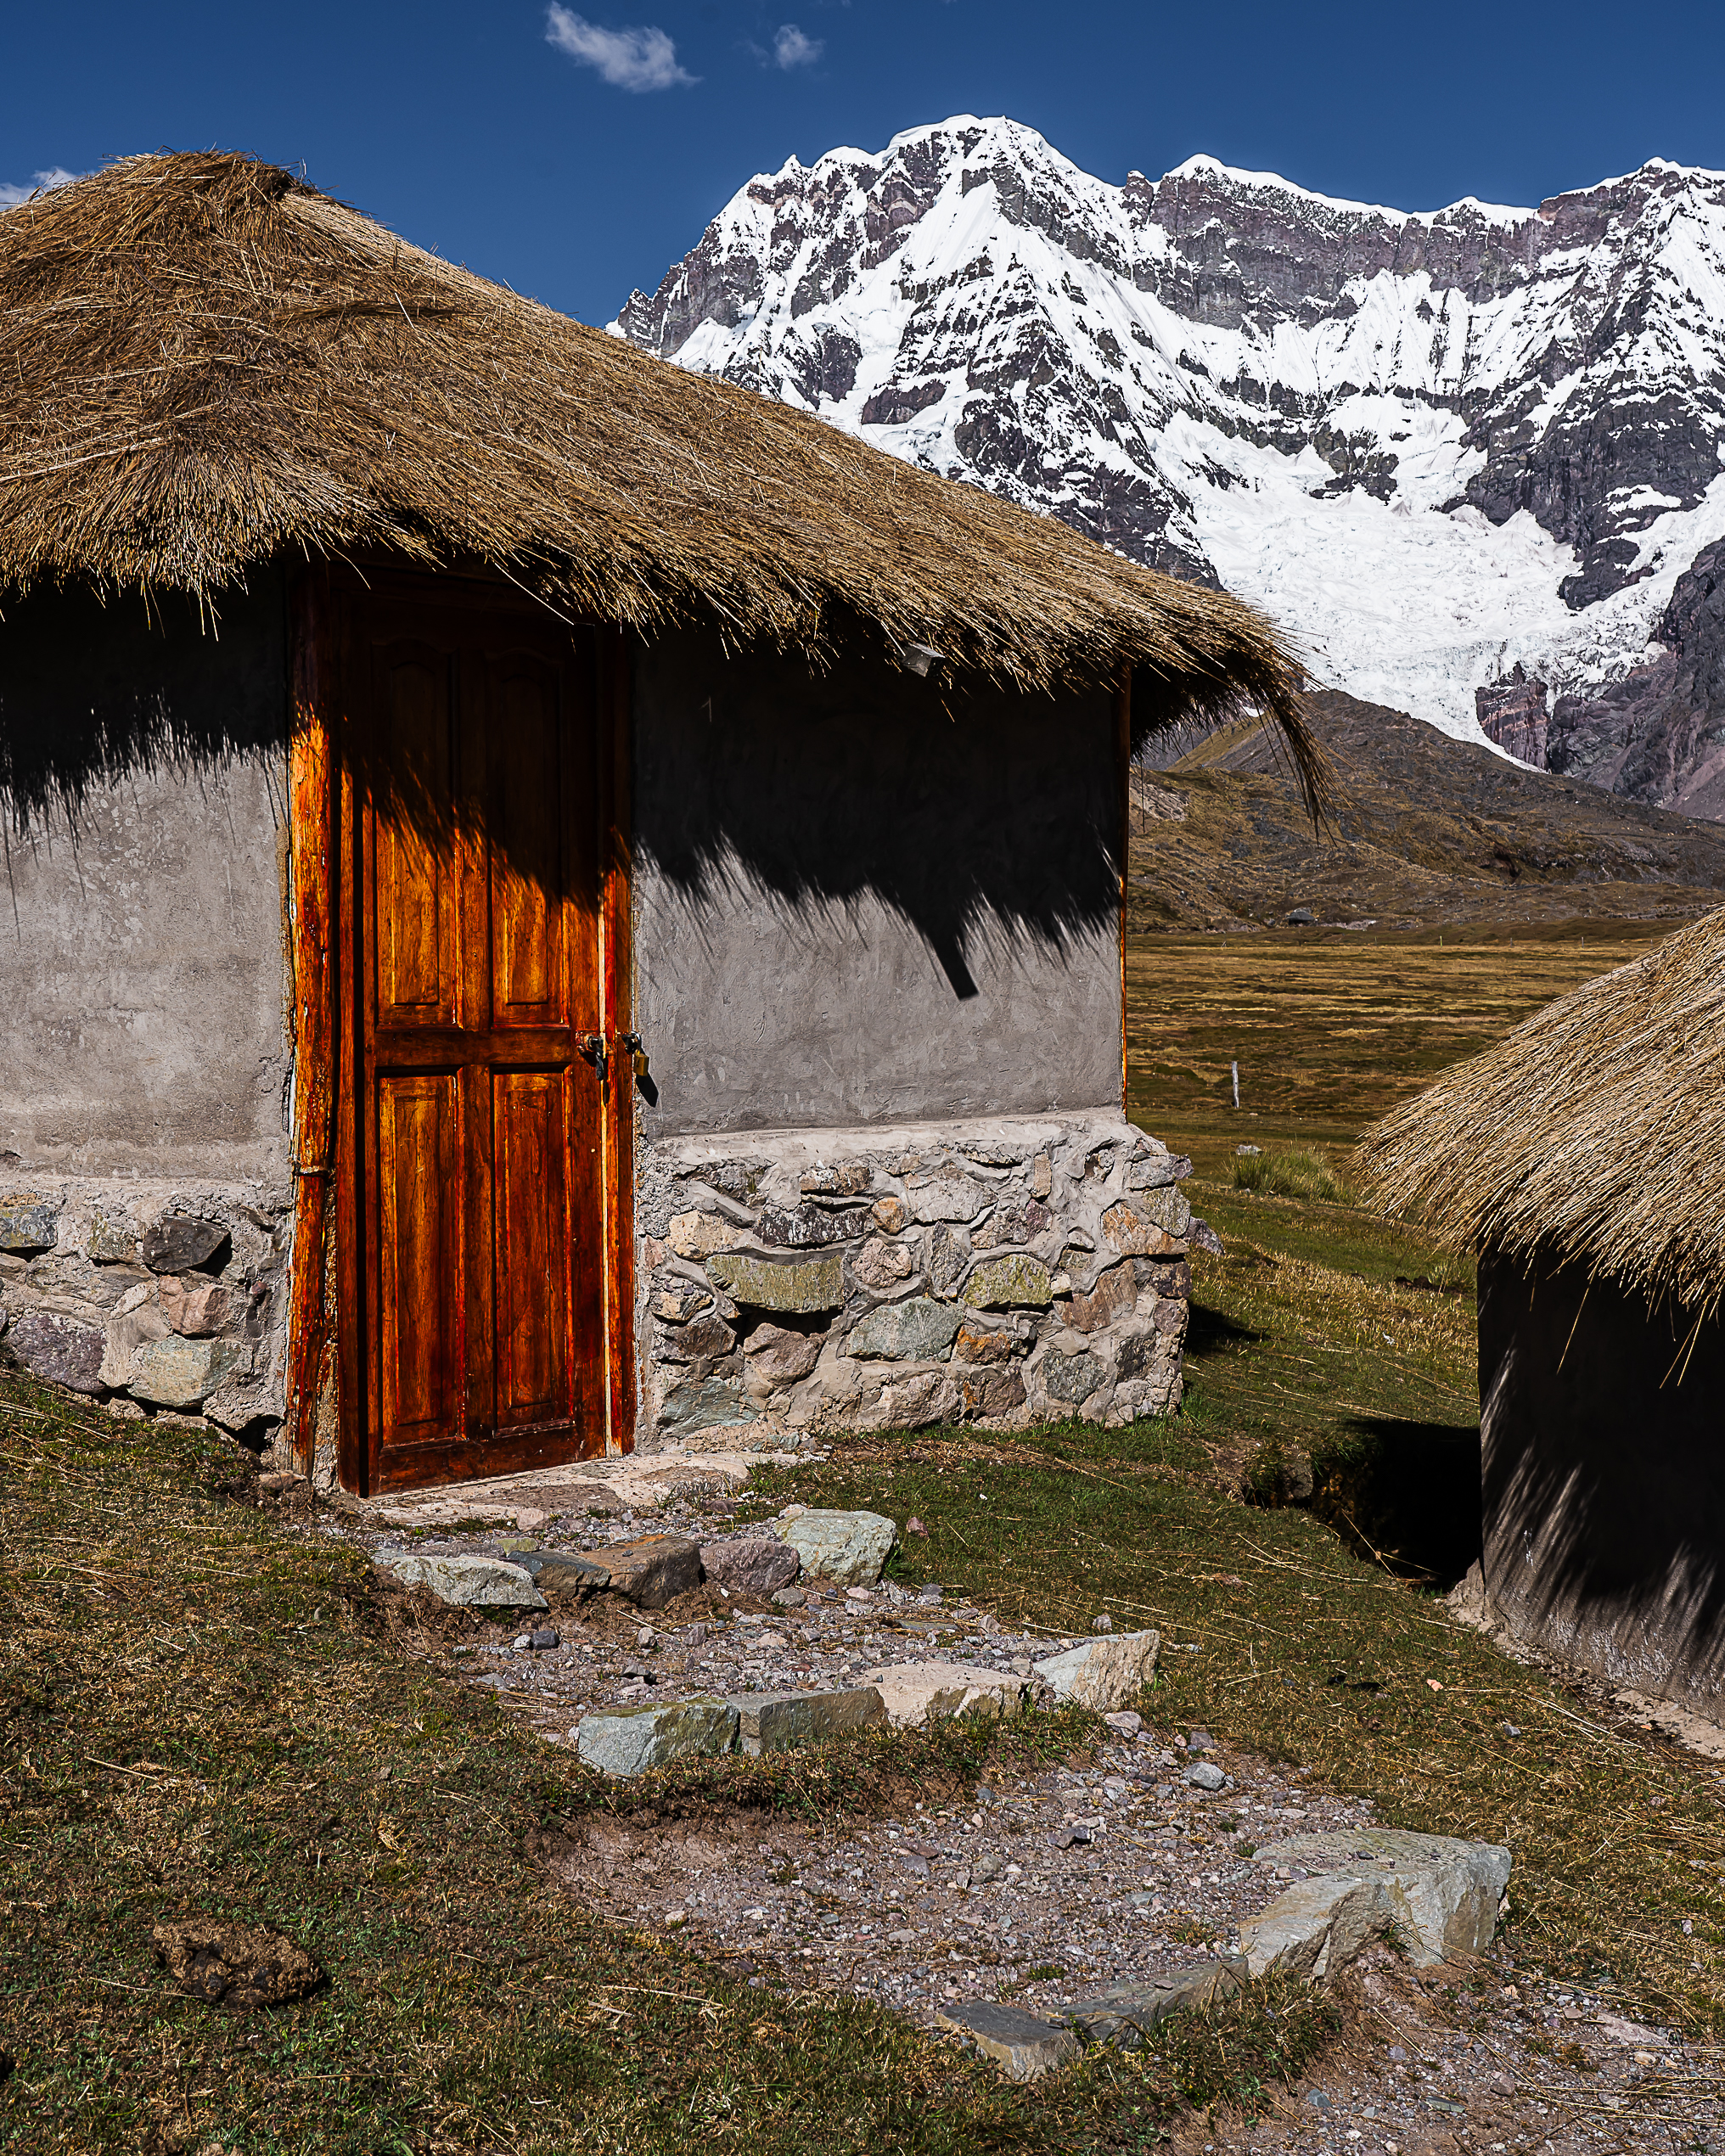
Arriving at the camp, the view’s incredible! We discover our accommodation, small cabins with large bay windows facing the summit of Ausangate! I can’t believe it! I’ve never had such luxurious accommodation while hiking in Peru!
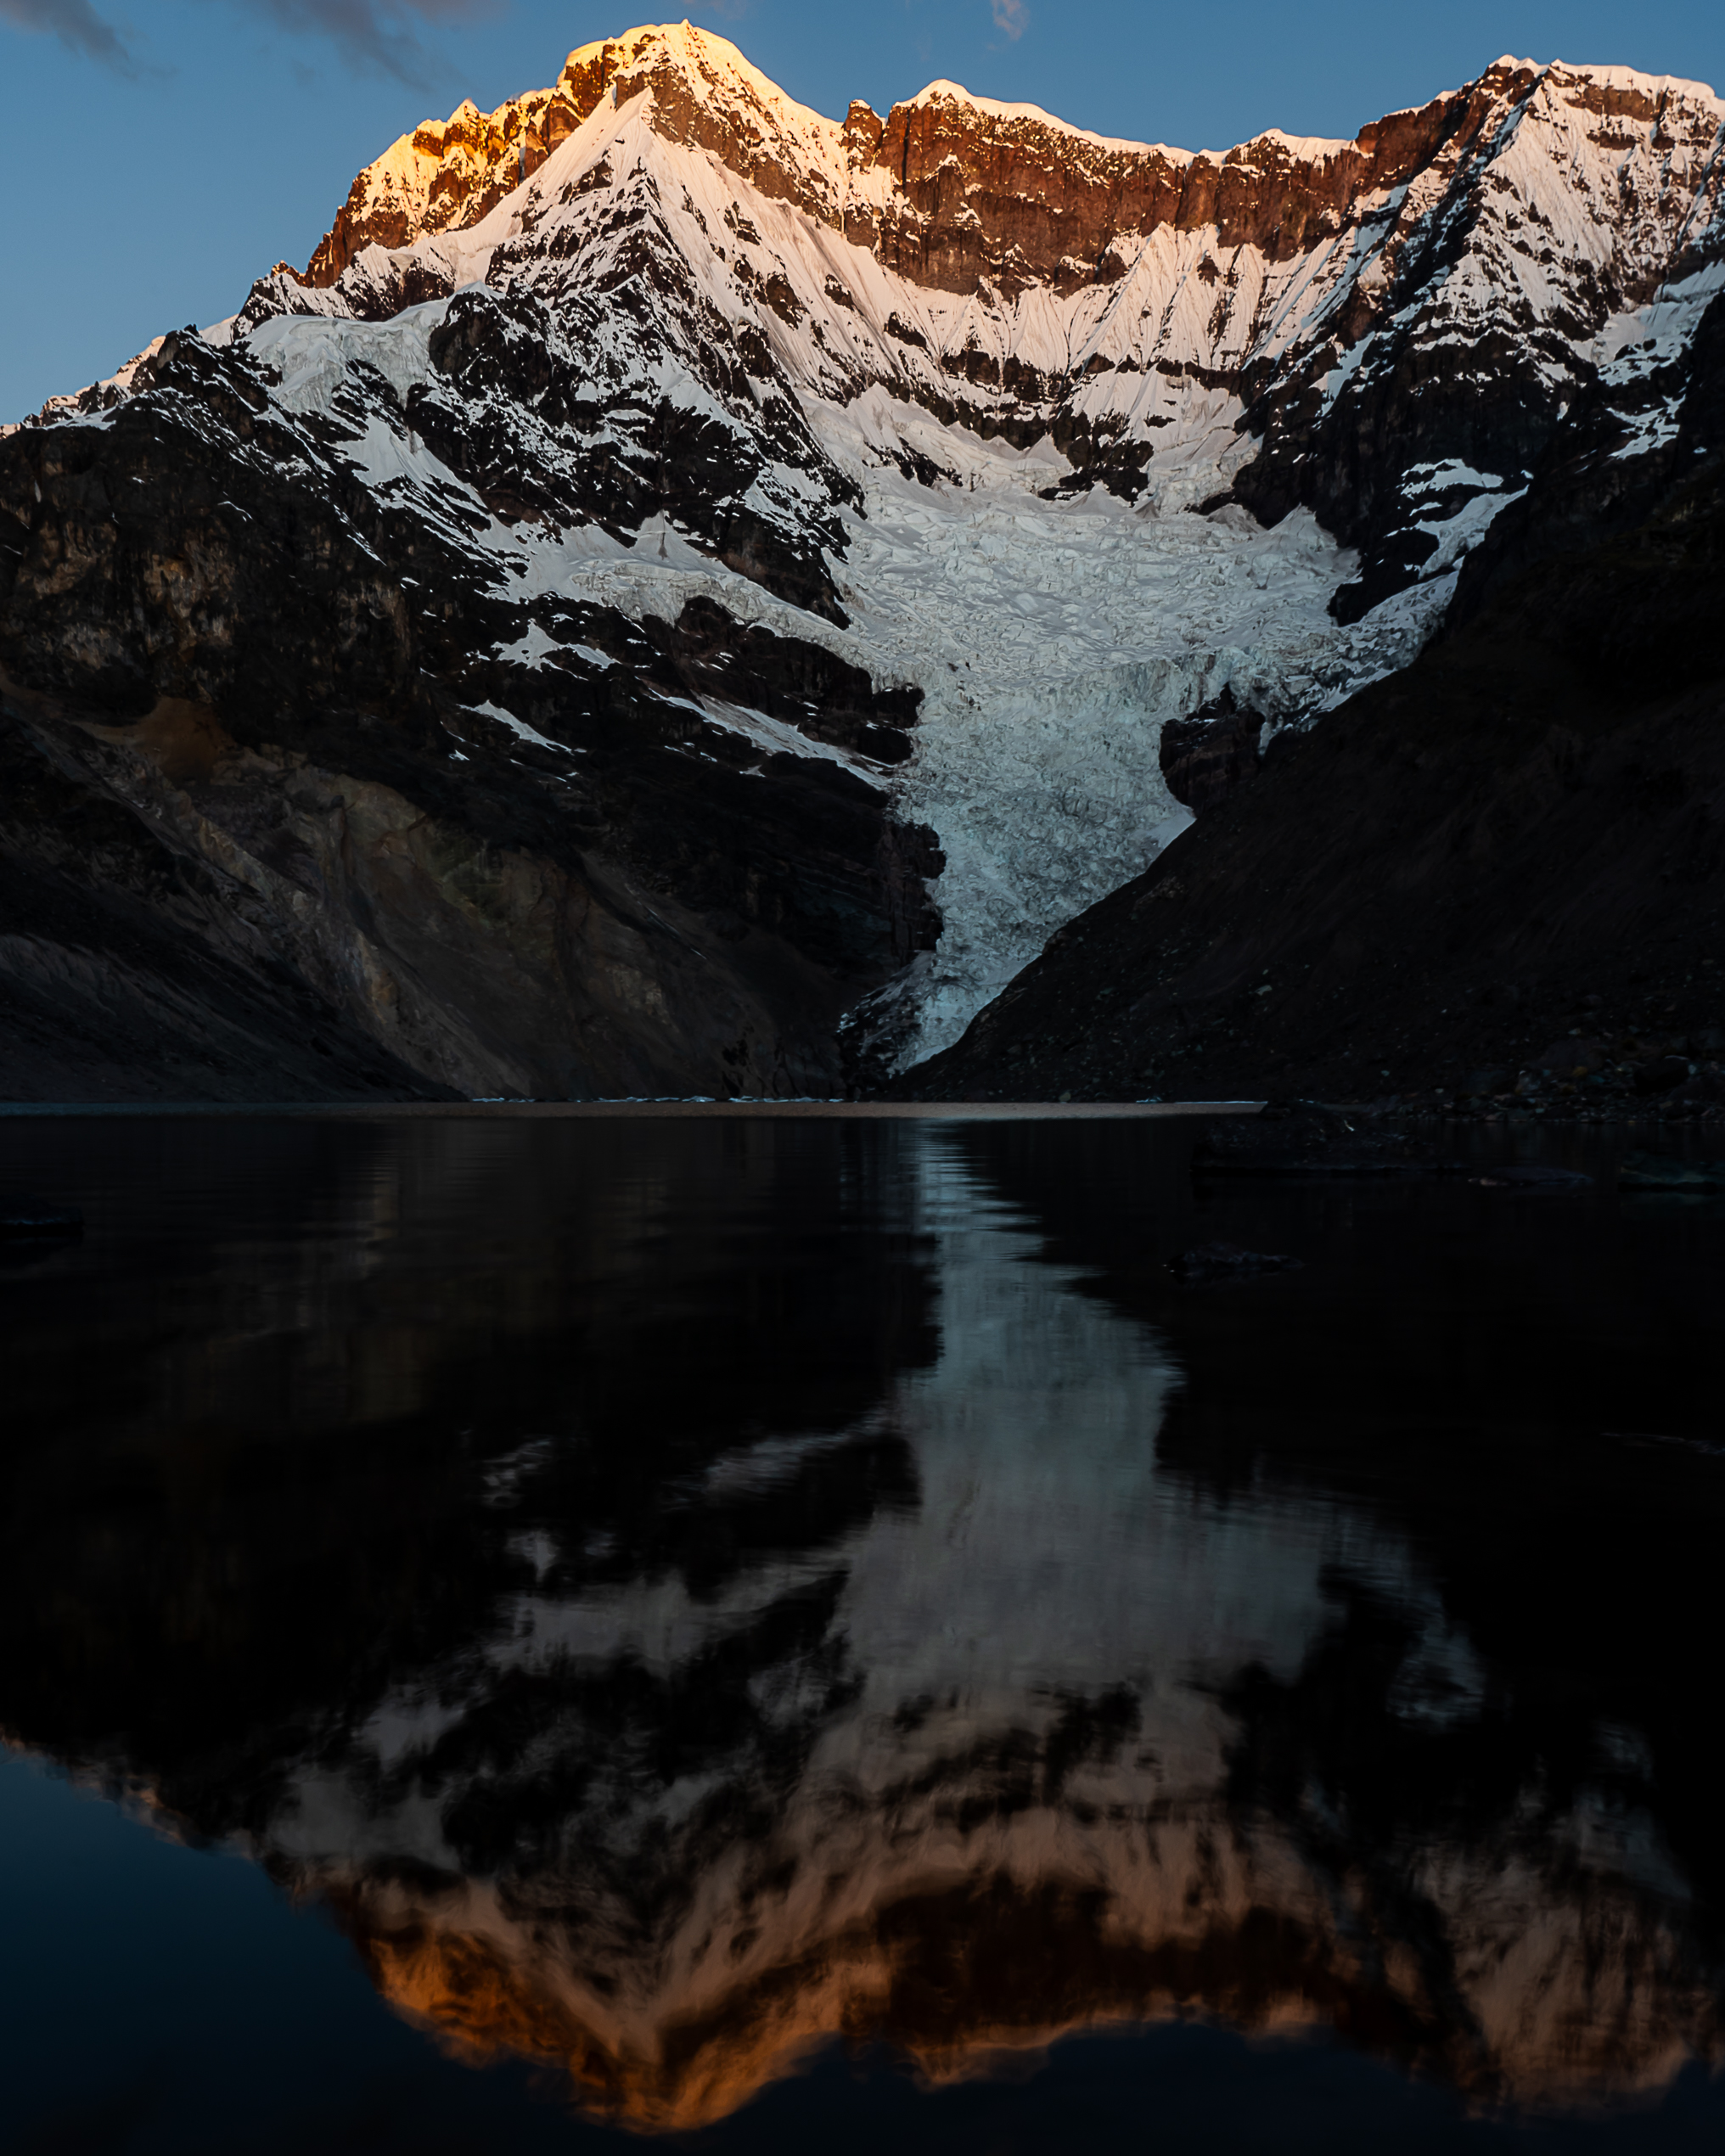
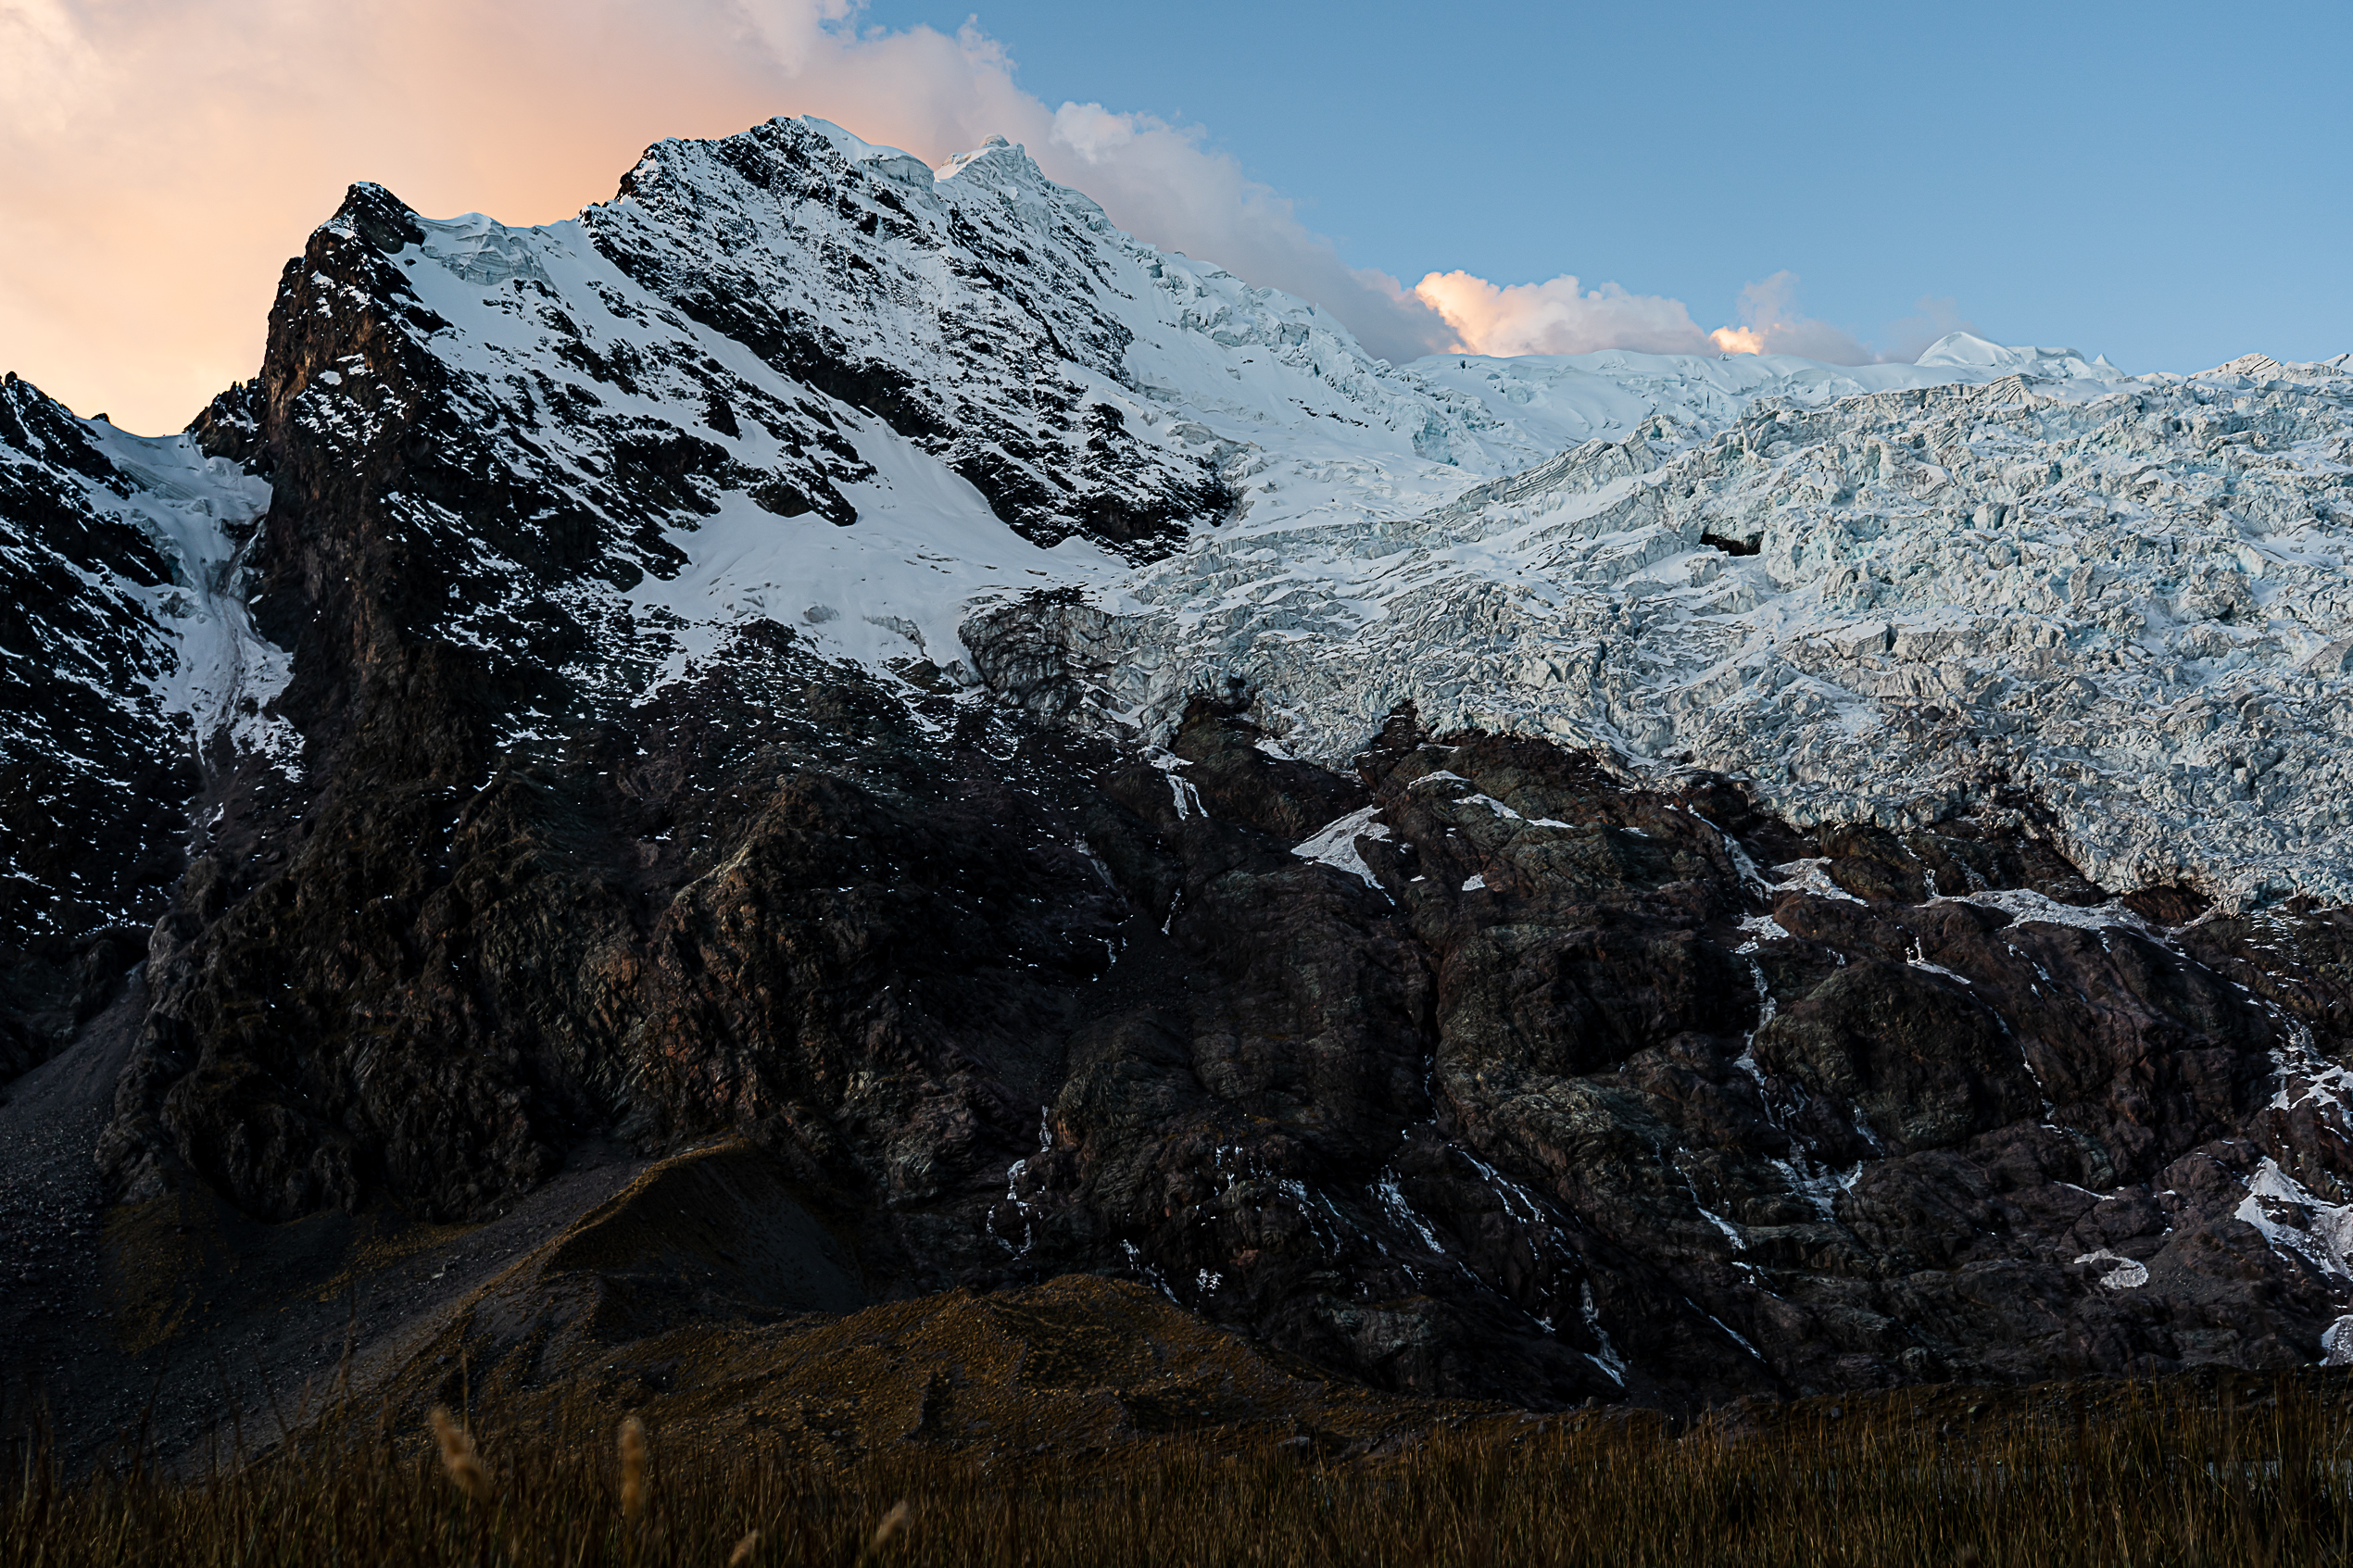
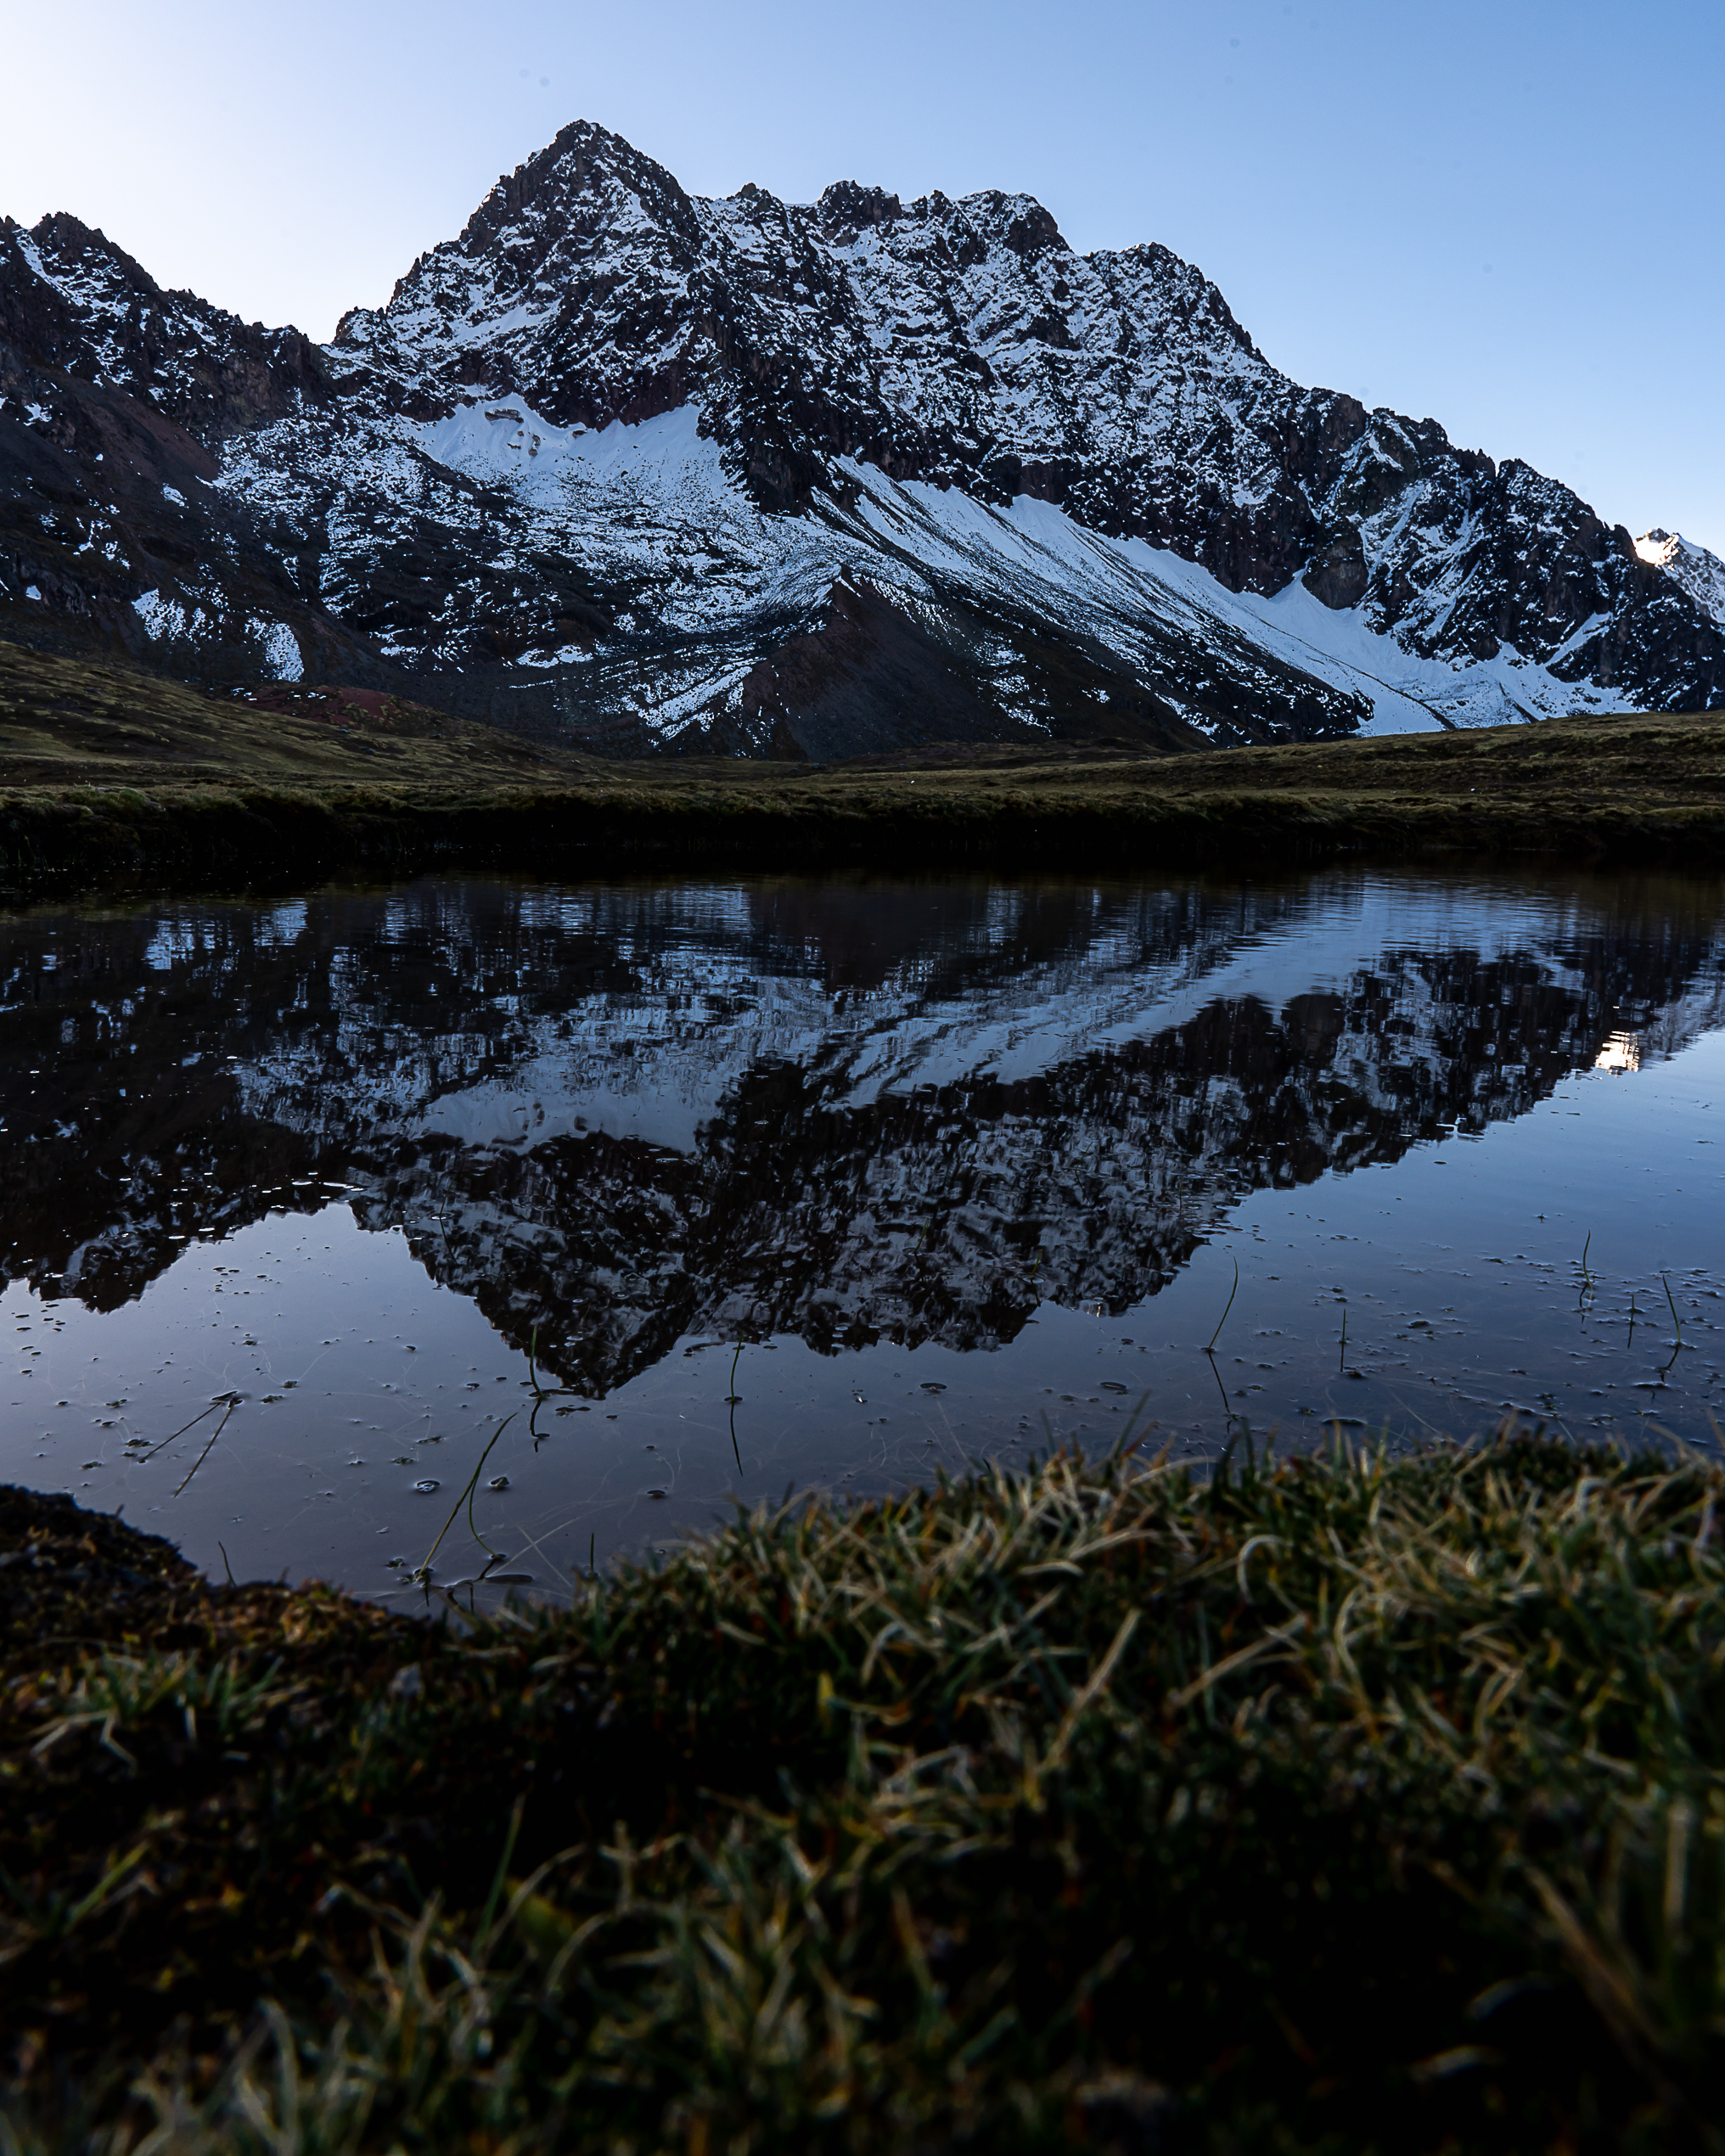
Then, late in the afternoon, we’re in good shape to make a return trip to Lake Upis during sunset. The path’s a little rockier but fairly easy. After 45 minutes we’re in front of this super beautiful lake facing the immensity of the Ausangate summit. Being there at the end of the day, the lake’s so calm that we can see the mountain and its glacier reflected in the water! I was really impressed by the immensity of this summit! The colors of the sunset were very pretty on the mountain. We return to camp when it gets dark. Before dinner, we see the Milky Way passing above the peaks! That’s wonderful! The next few days of the Ausangate trek promise to be epic!
If you would like to view the path in more detail, click here for the morning and here for the one towards Lake Upis.
DAY 2: 10.67 km - 468 m elevation gain
LAKE HATUN PUCACOCHA
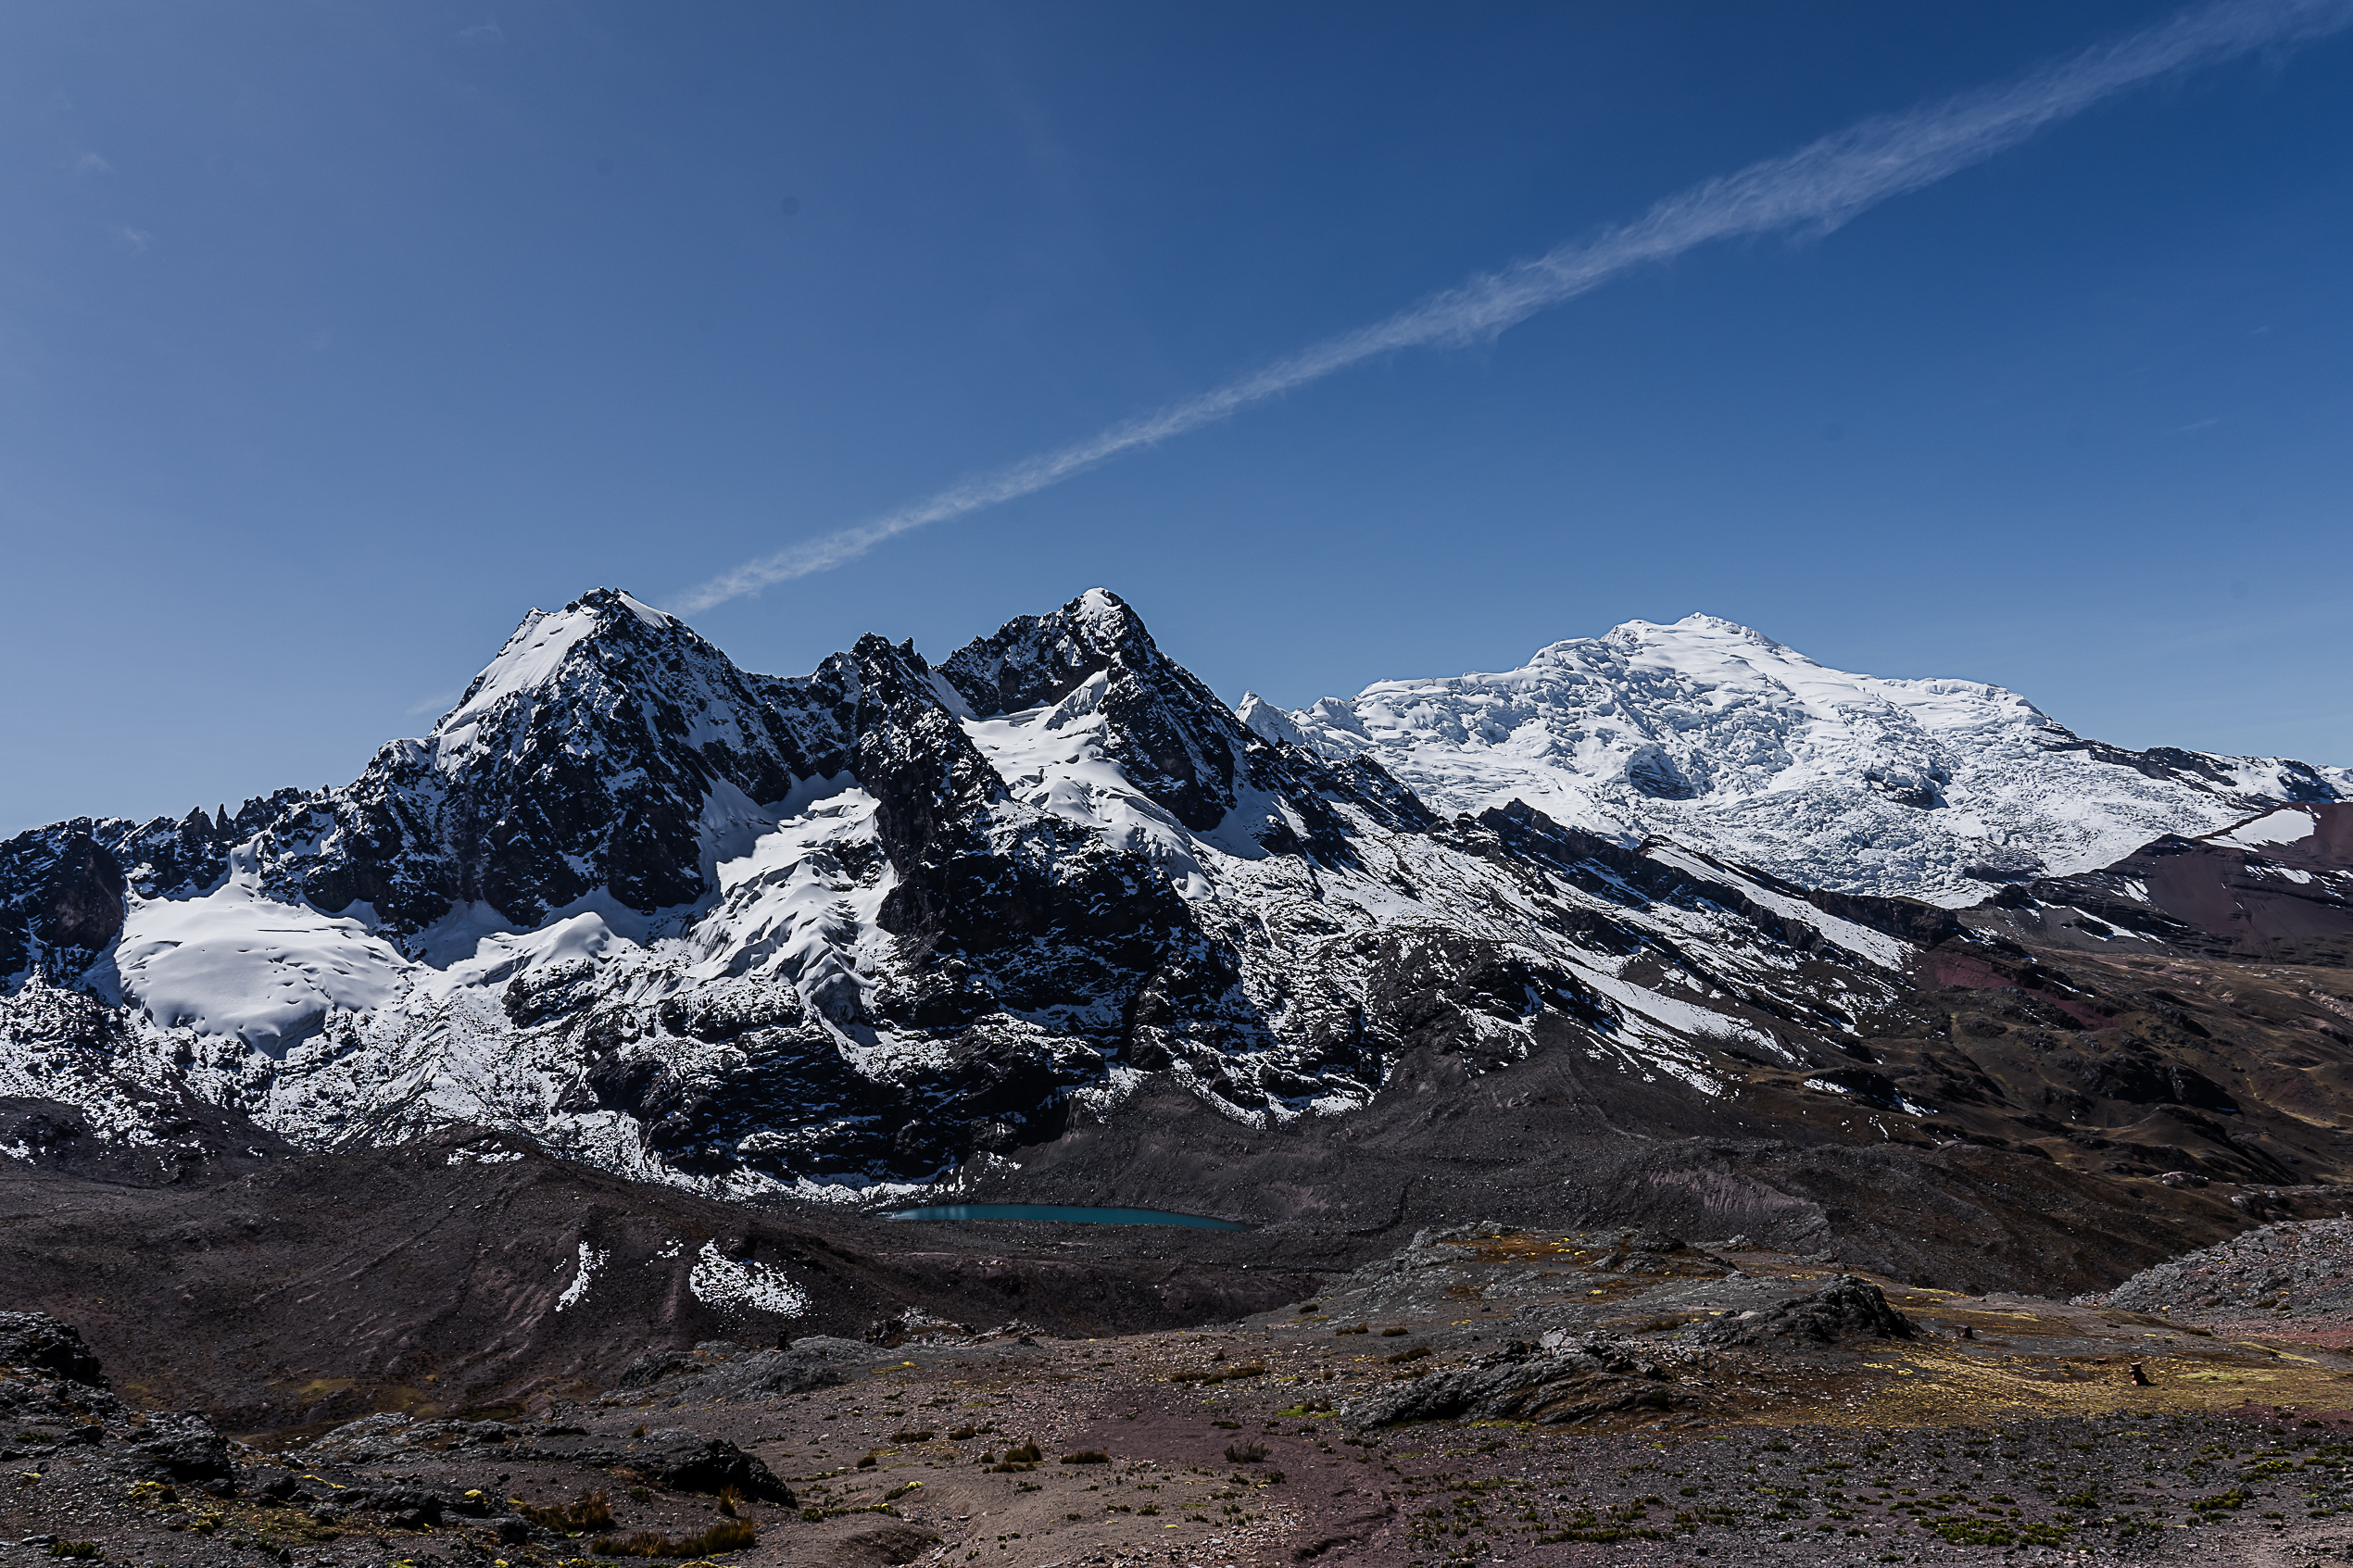
Wake up early at 5:30 a.m. with a hot drink prepared by our guides. We prepare our bags before having breakfast around 6am. We leave with low temperatures around 7:30 a.m. A nice climb awaits us to start. Altitude sickness is coming for me, but my guide gave great advice and helped me overcome it throughout the Ausangate trek. At the top of this small climb, we see Lake Upis with its snow-capped peaks! It’s an incredible view! We continue our hike bypassing the Ausangate. We gradually discover other facets of the mountain with its glaciers. It’s really beautiful! I’ve never seen such an impressive mountain with eternal snow, and so close.
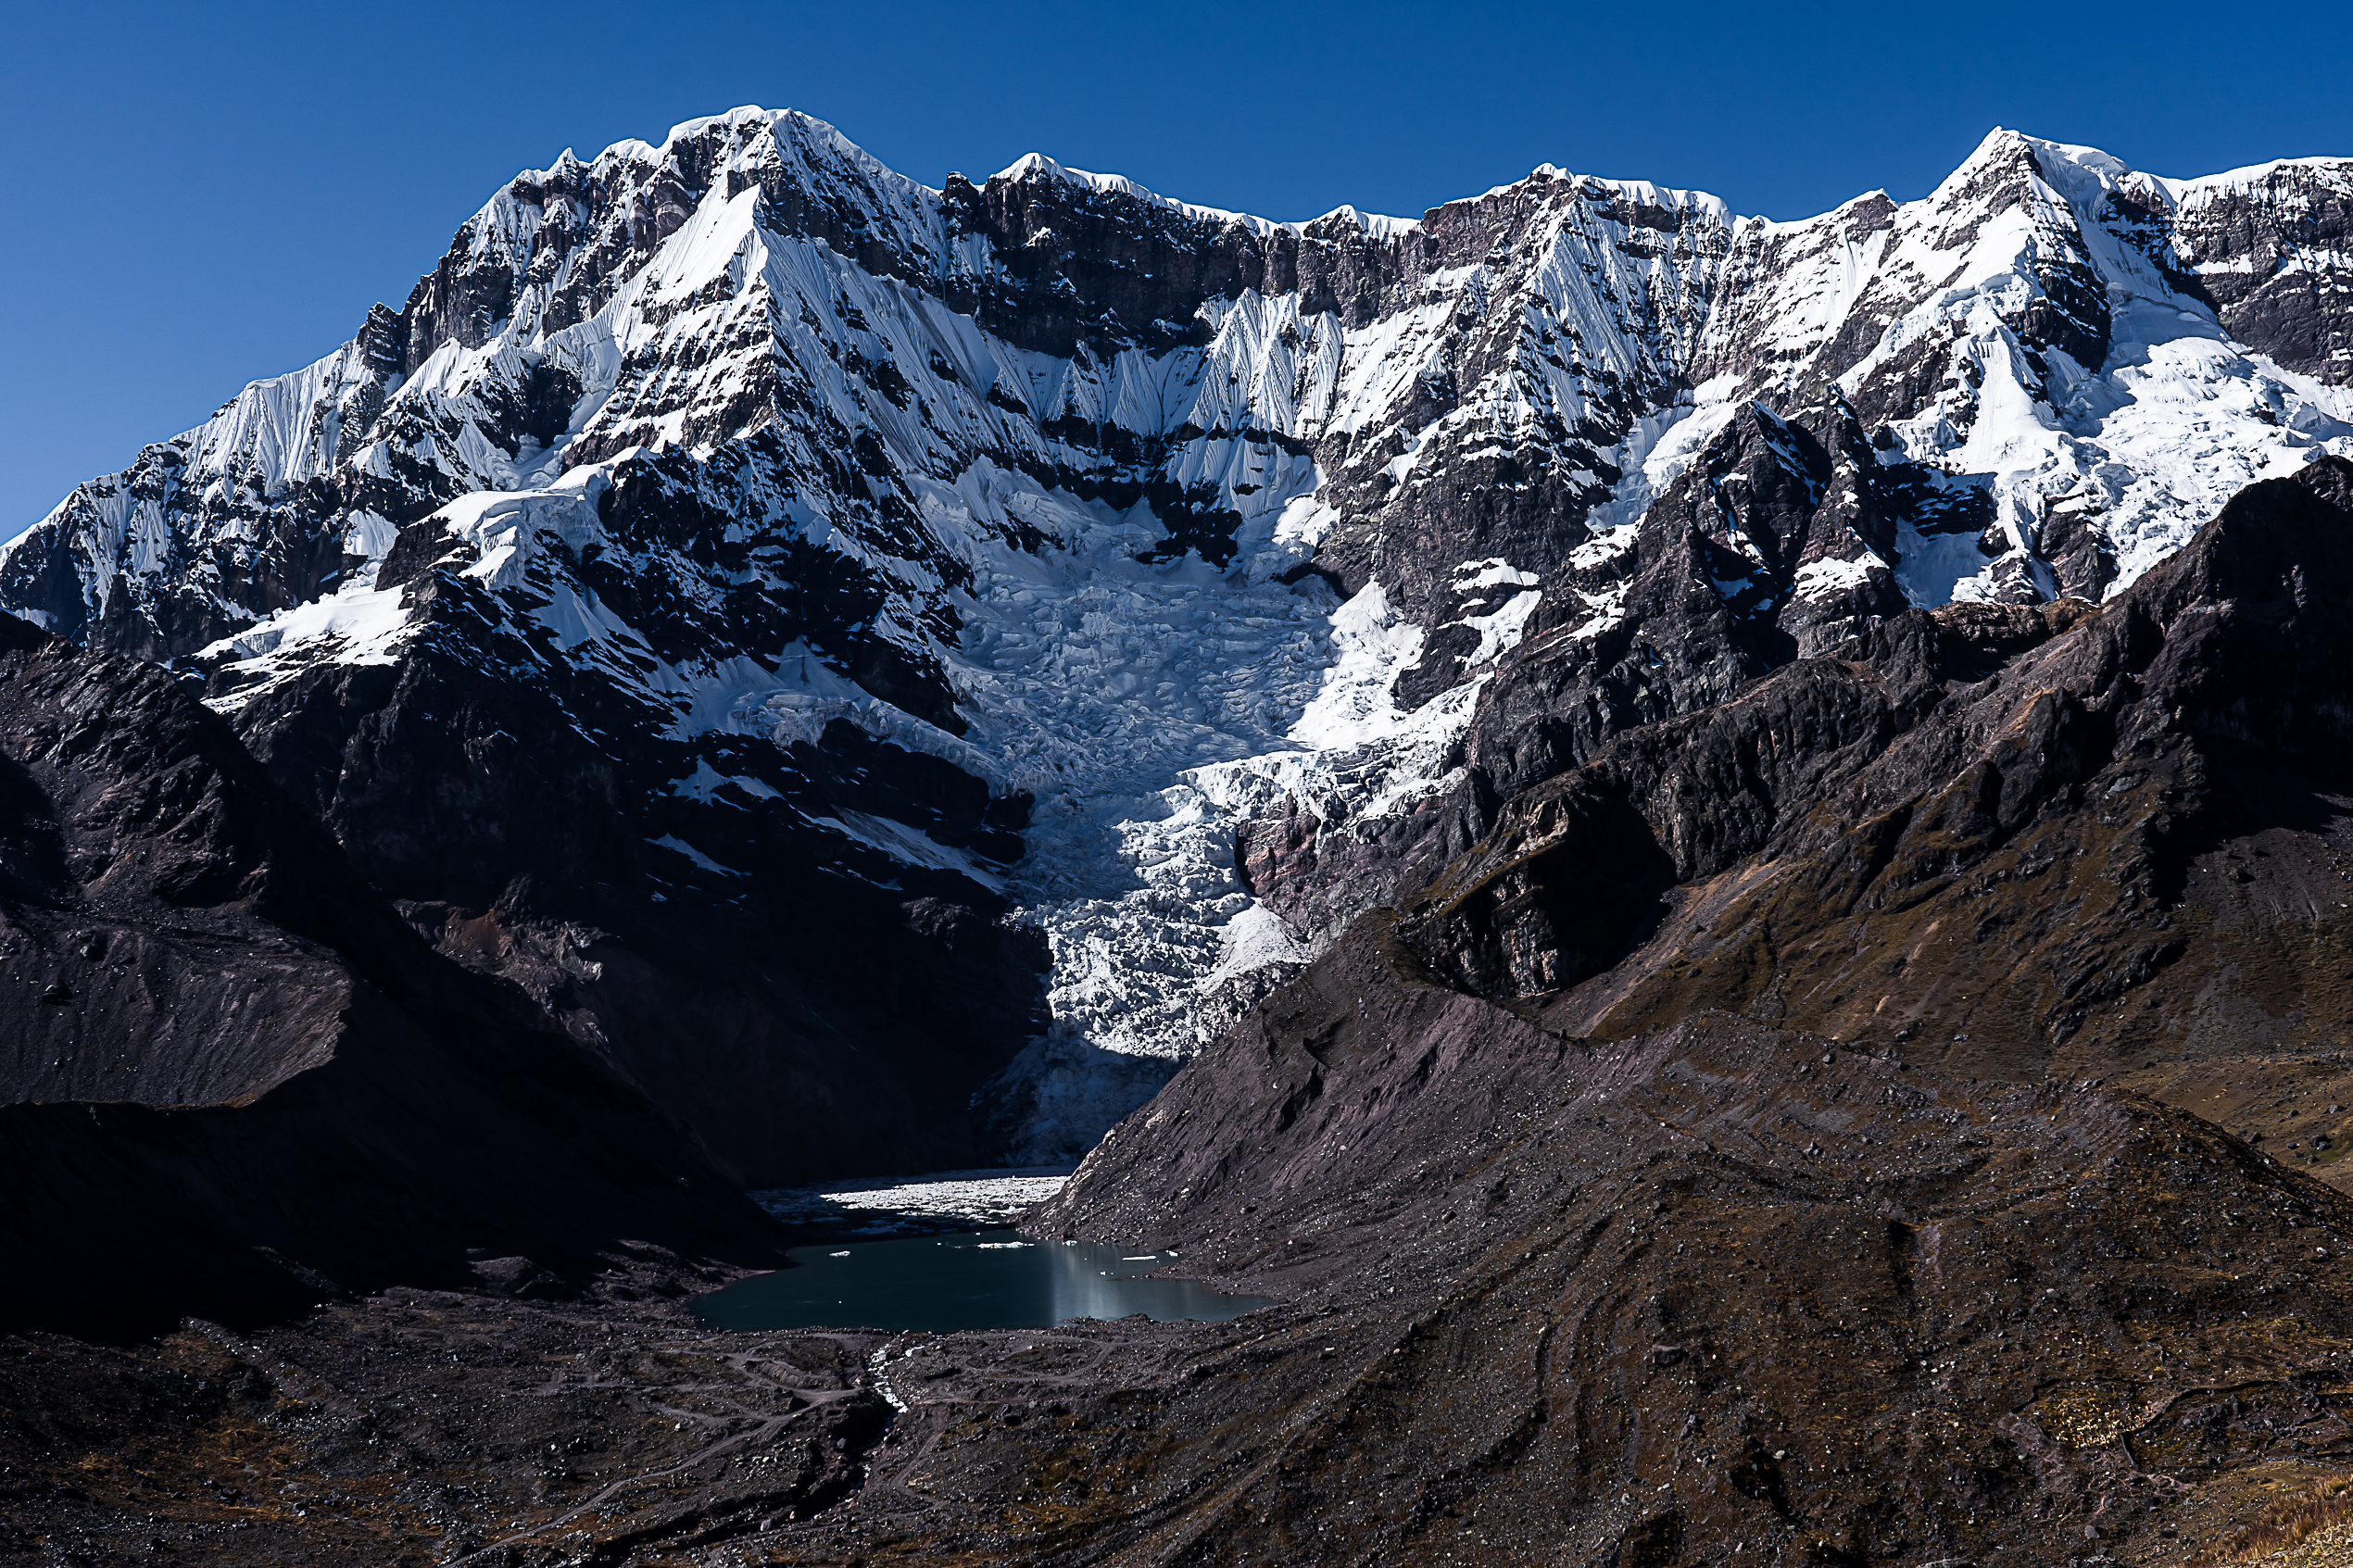
We take our time taking photos and finding super beautiful places. As the group is oriented towards photography, our guide gives us great advice and finds the right spots. We pass by the Arapa summit, located at 4,968 m above sea level, the highest I’ve been able to do so far while hiking in Peru. We then arrive for lunch at our camp, around 2:30 p.m. Fortunately the agency provides snacks. A magnificent place which gives a beautiful view of the Ausangate and its glacier above. The location’s just incredible, I’ve no words!
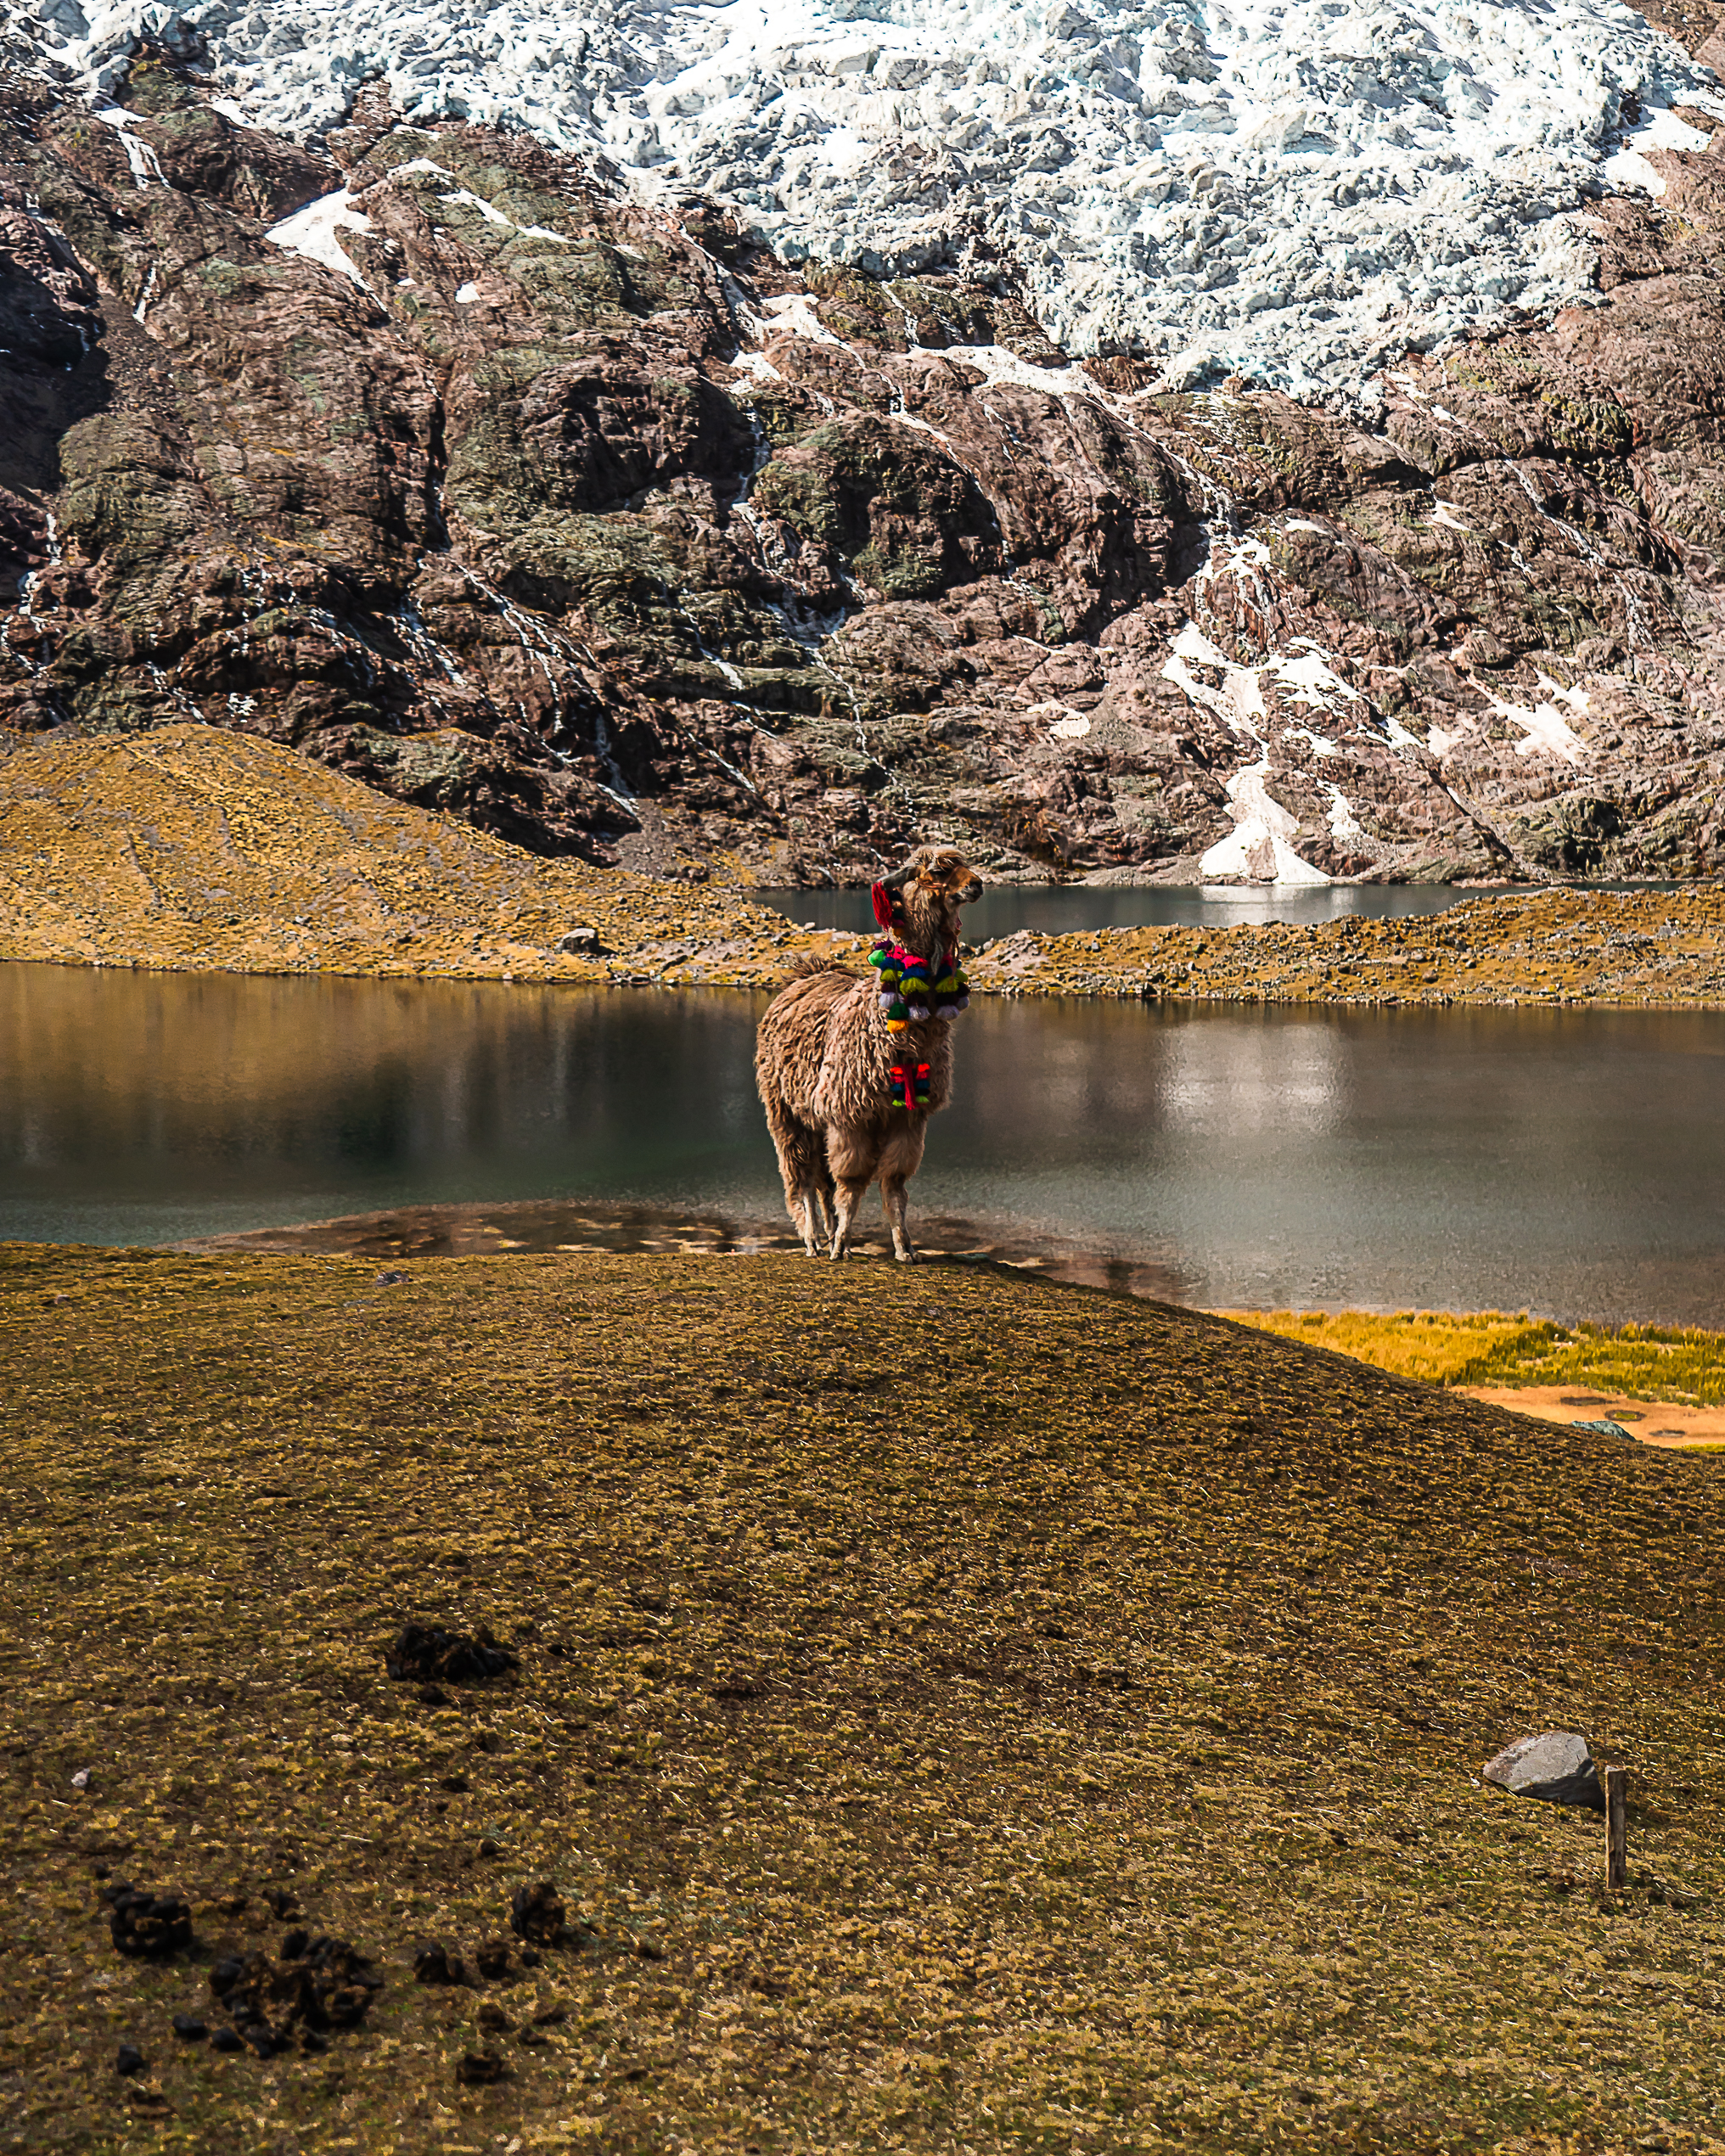
After a good lunch, we’re free for the afternoon. I decide to get closer to one of the lakes with a waterfall coming from the glacier. A beautiful place to contemplate nature in complete tranquility. To think that we saw few people for two days apart another small group of hikers, and some locals. I stay until sunset which gives incredible colors on the glacier. I advise you to return to the camp during sunset, so as not to get lost, but also because it’s a little higher up and allows you to have a super beautiful view. We then have dinner before going to bed at 4,500 m altitude. If you’re lucky, maybe you can admire the stars passing over this mountain.
To view the route we took on the second day of the Ausangate trek, click here.
DAY 3: 9 km - 776 m elevation gain
PUCA COCHA SUMMIT
The third day was the hardest day of the Ausangate trek for me. For what ? Because in 7 hours of hiking, we’ve 3 big climbs at high altitude…
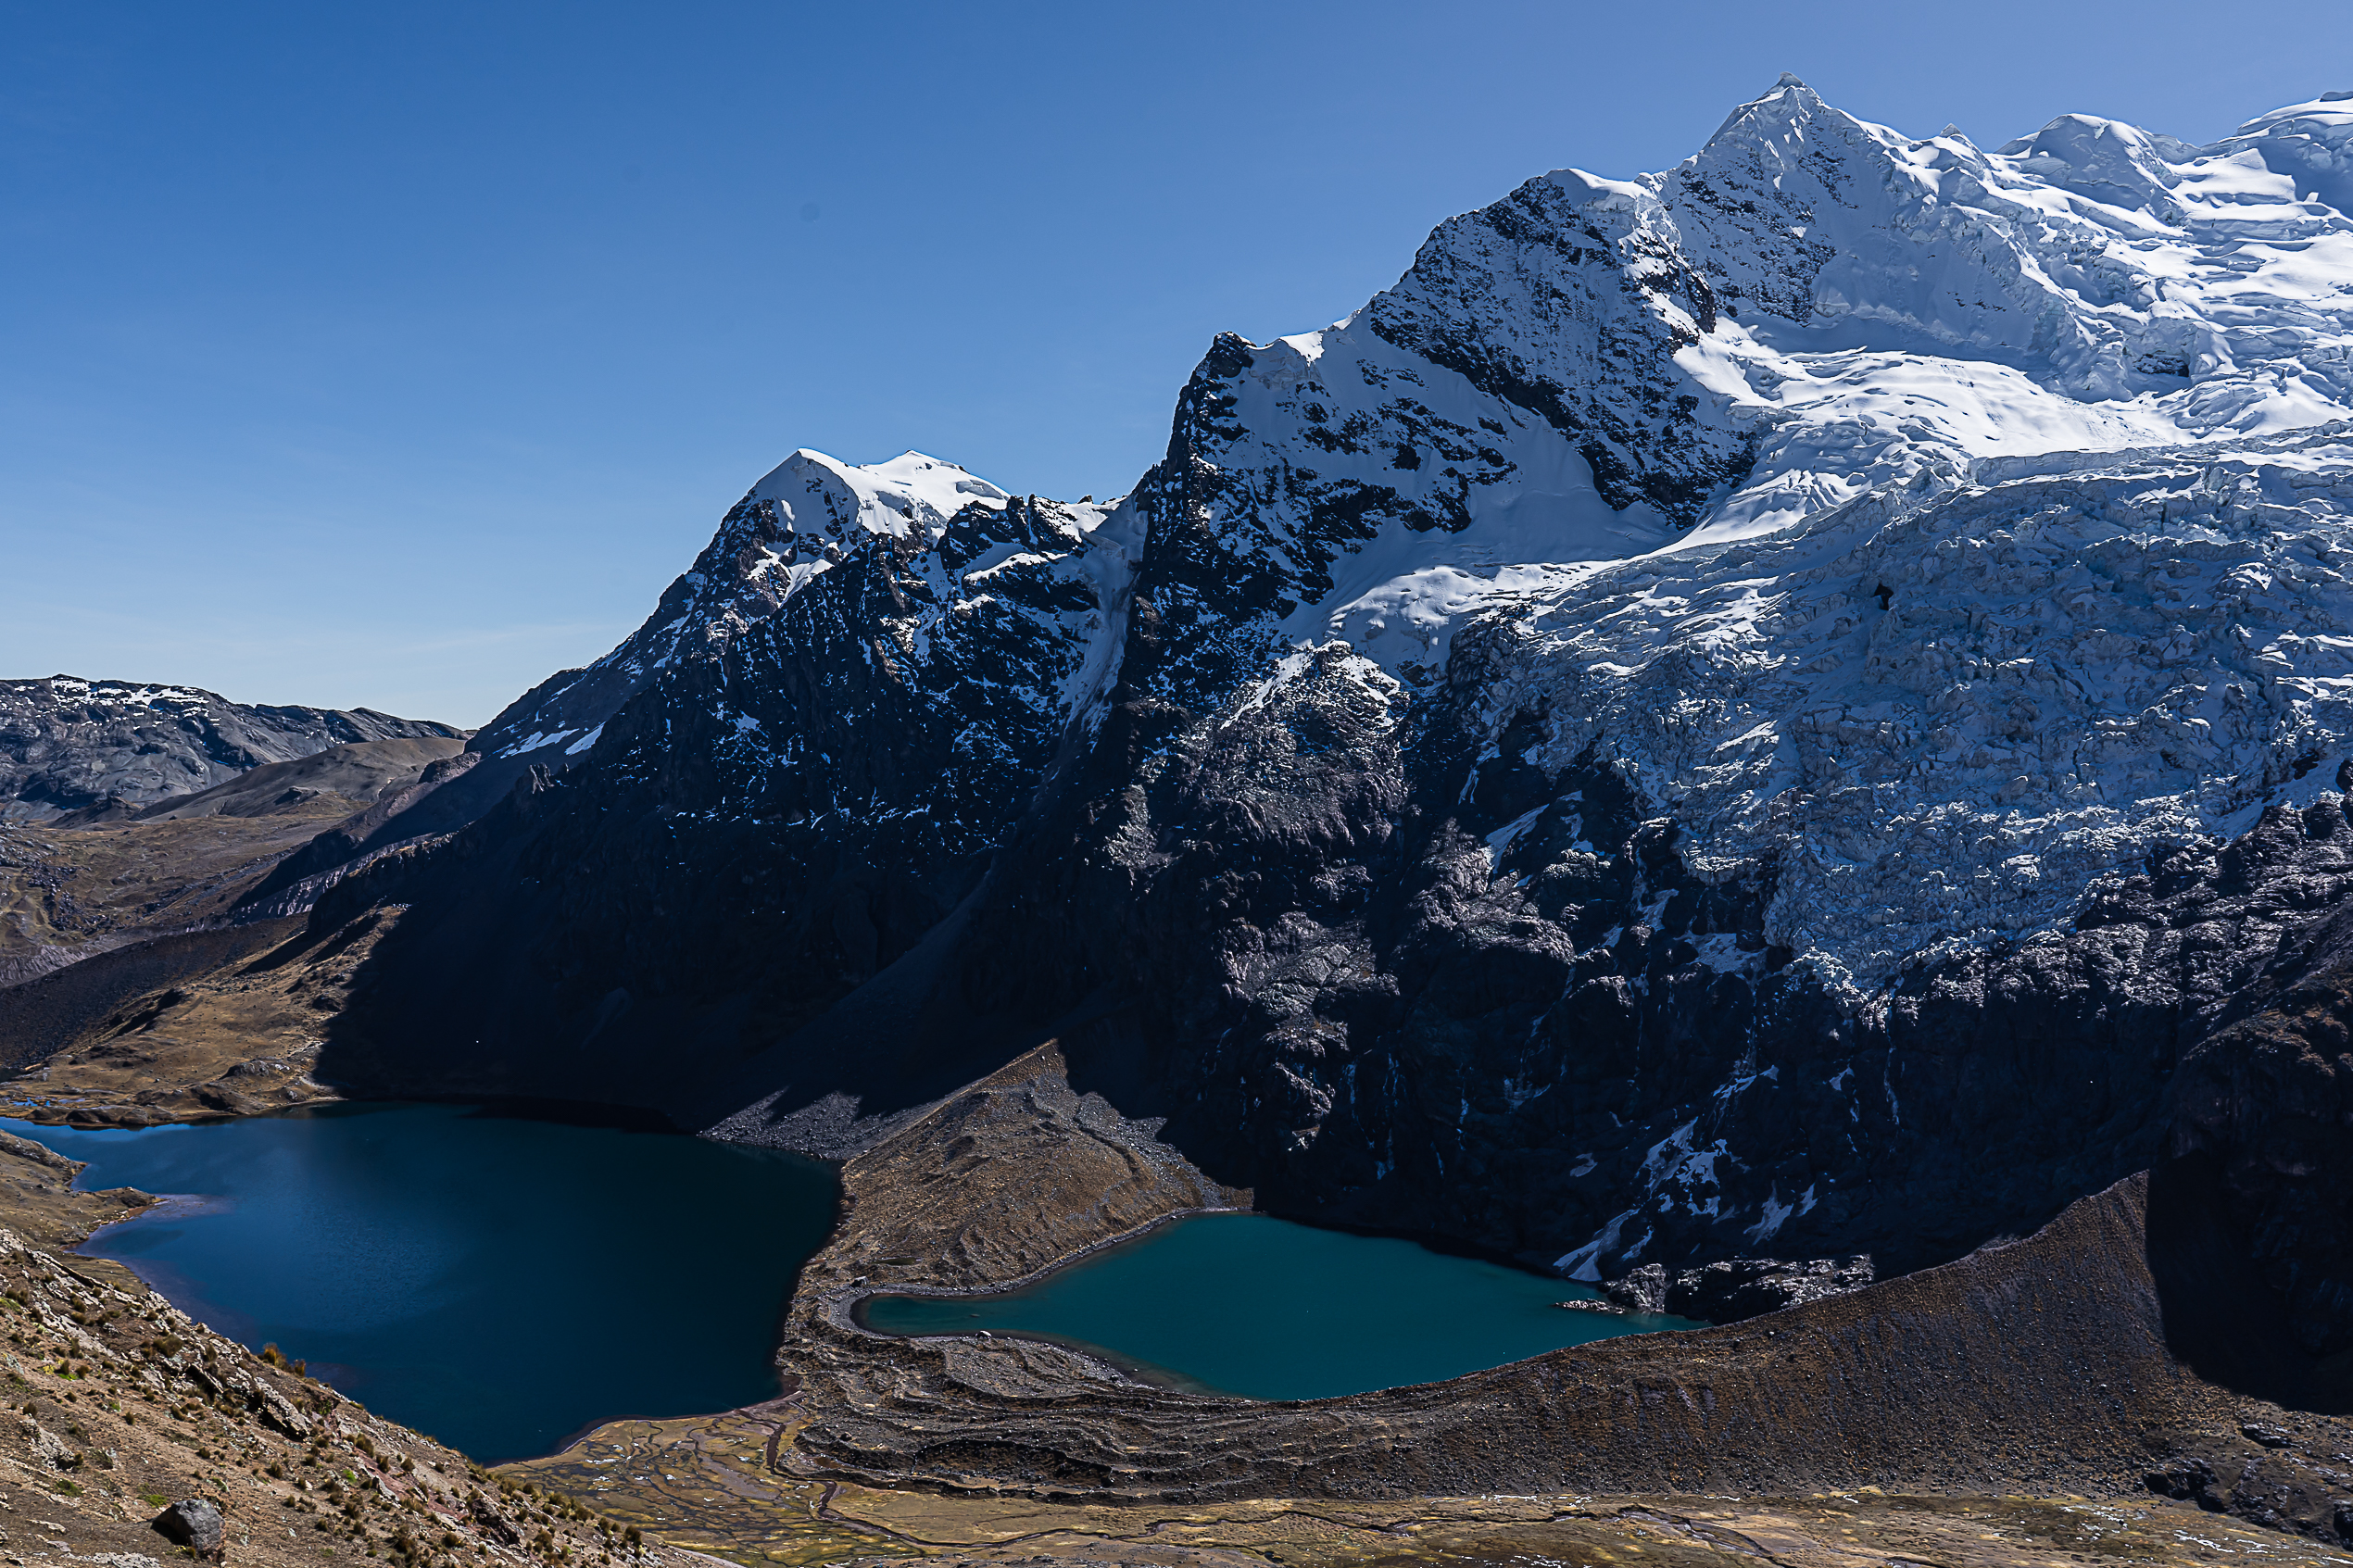
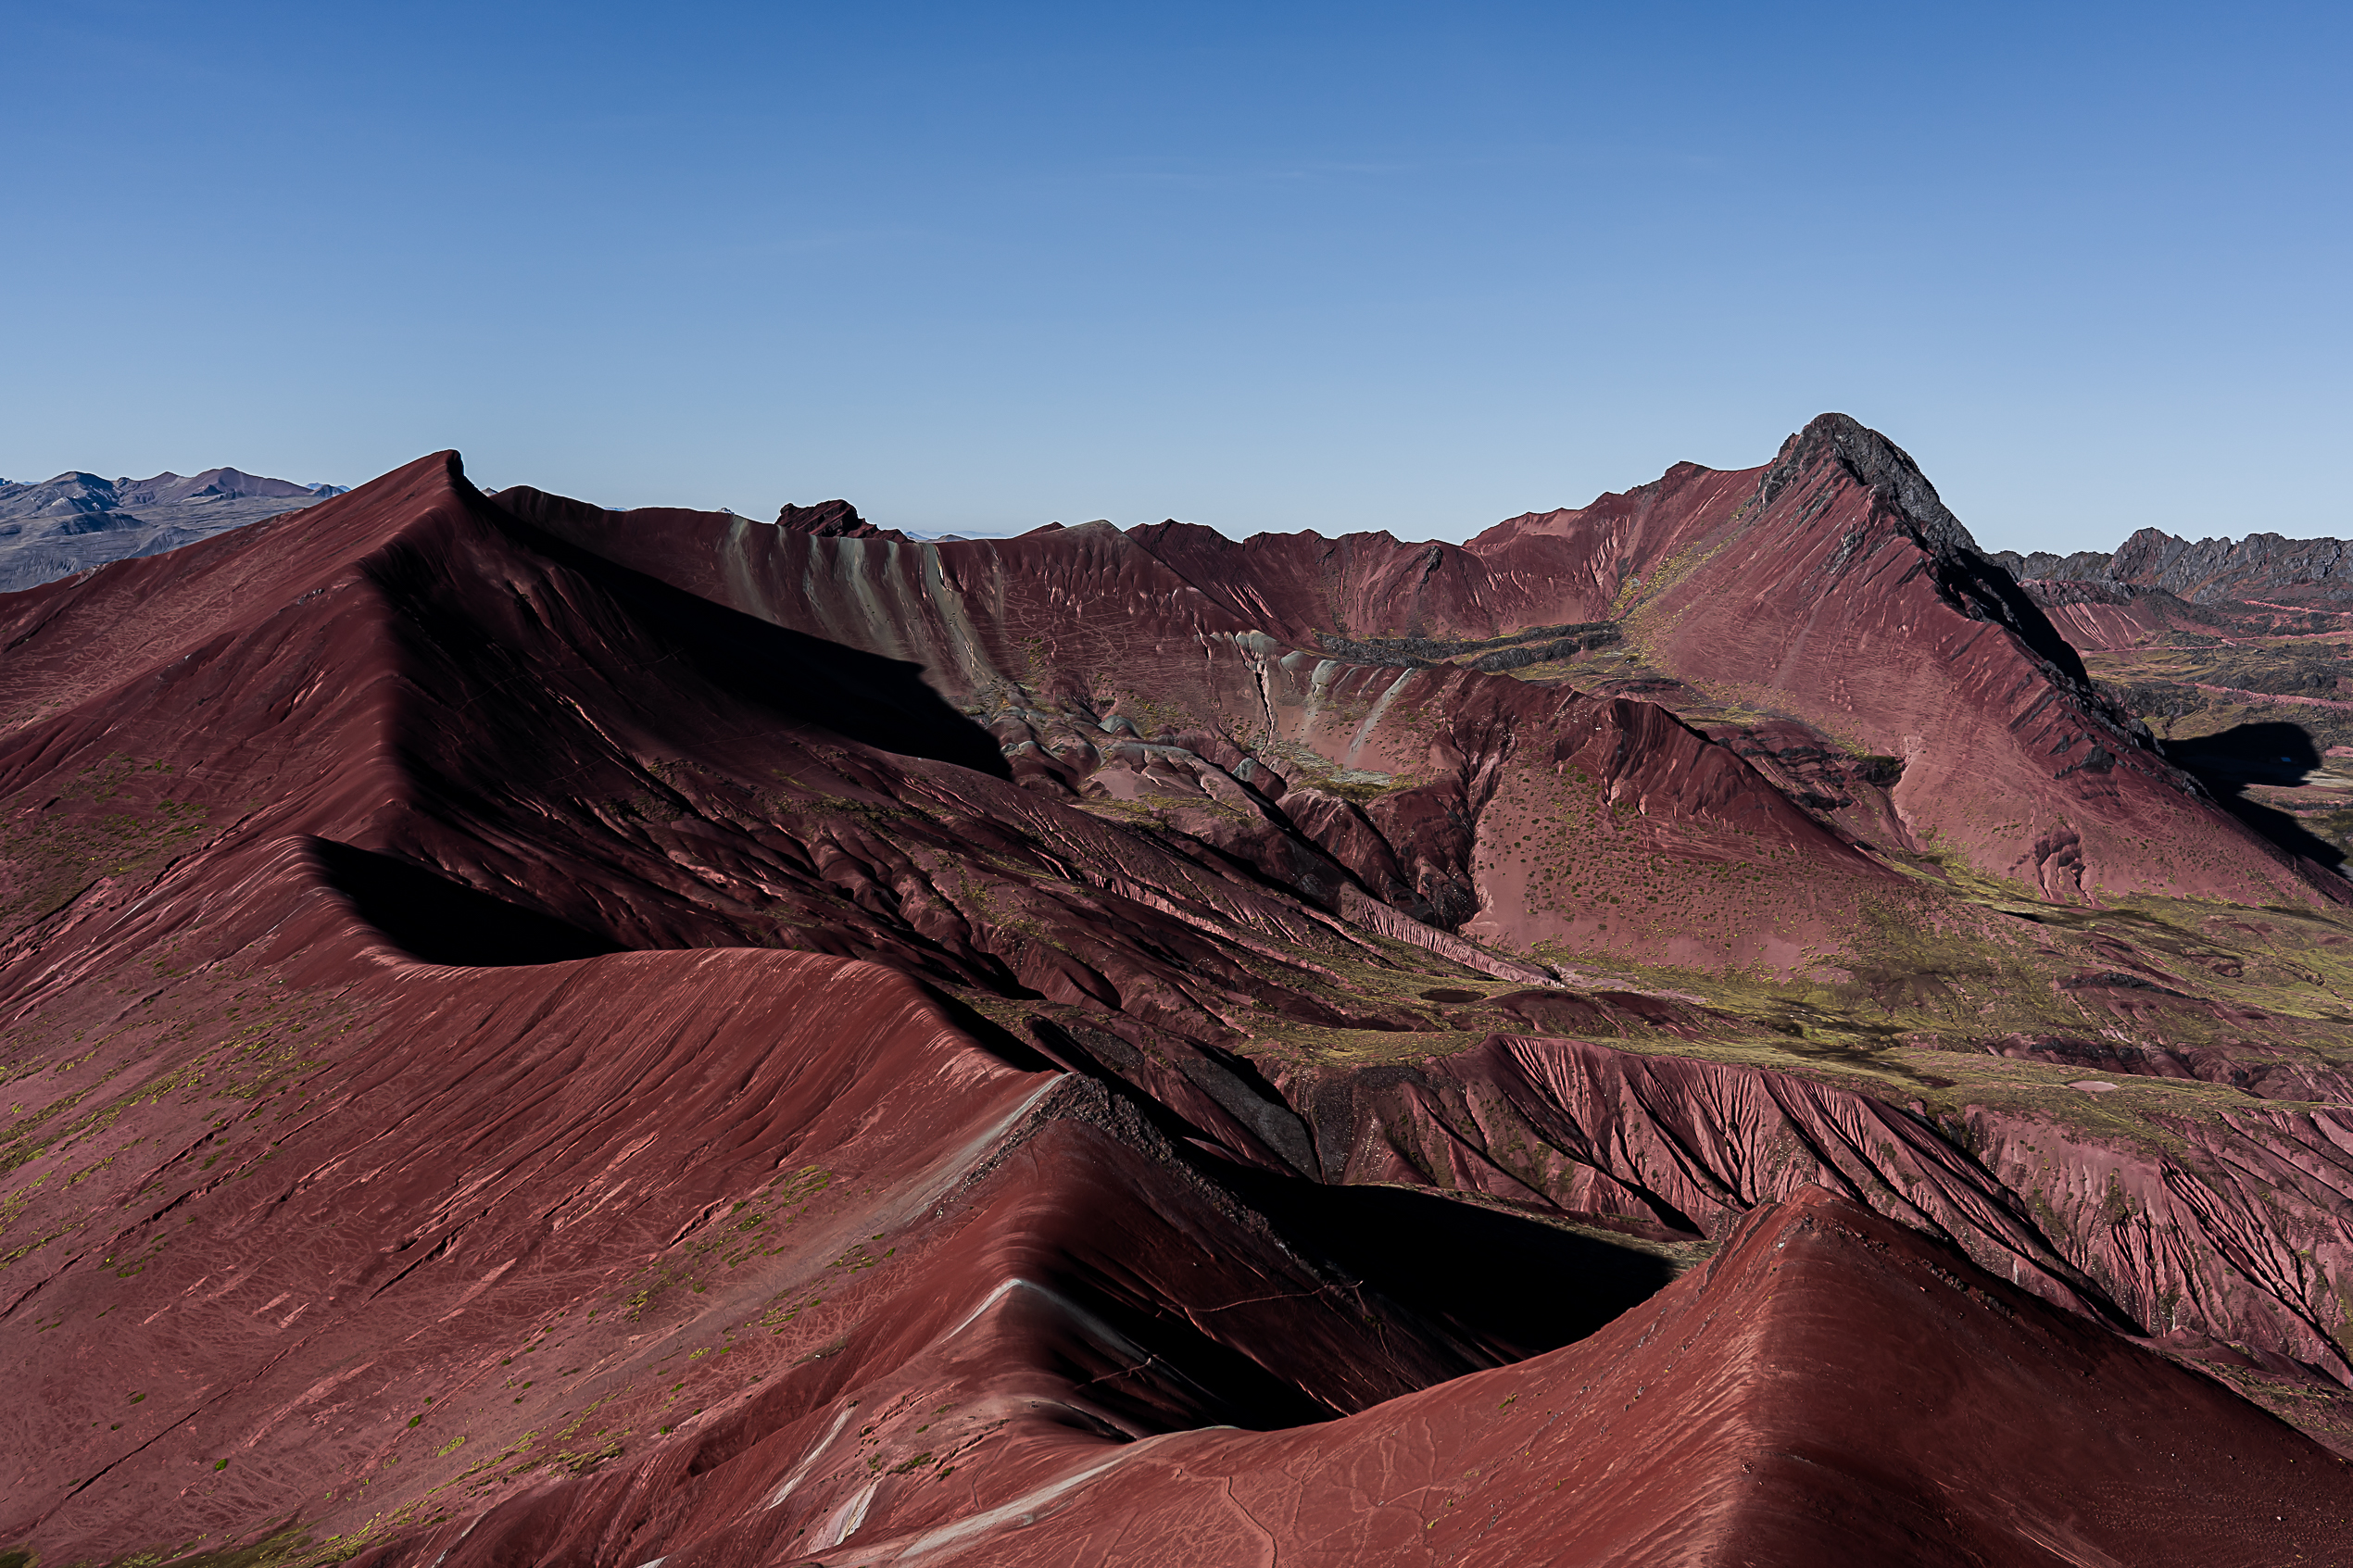
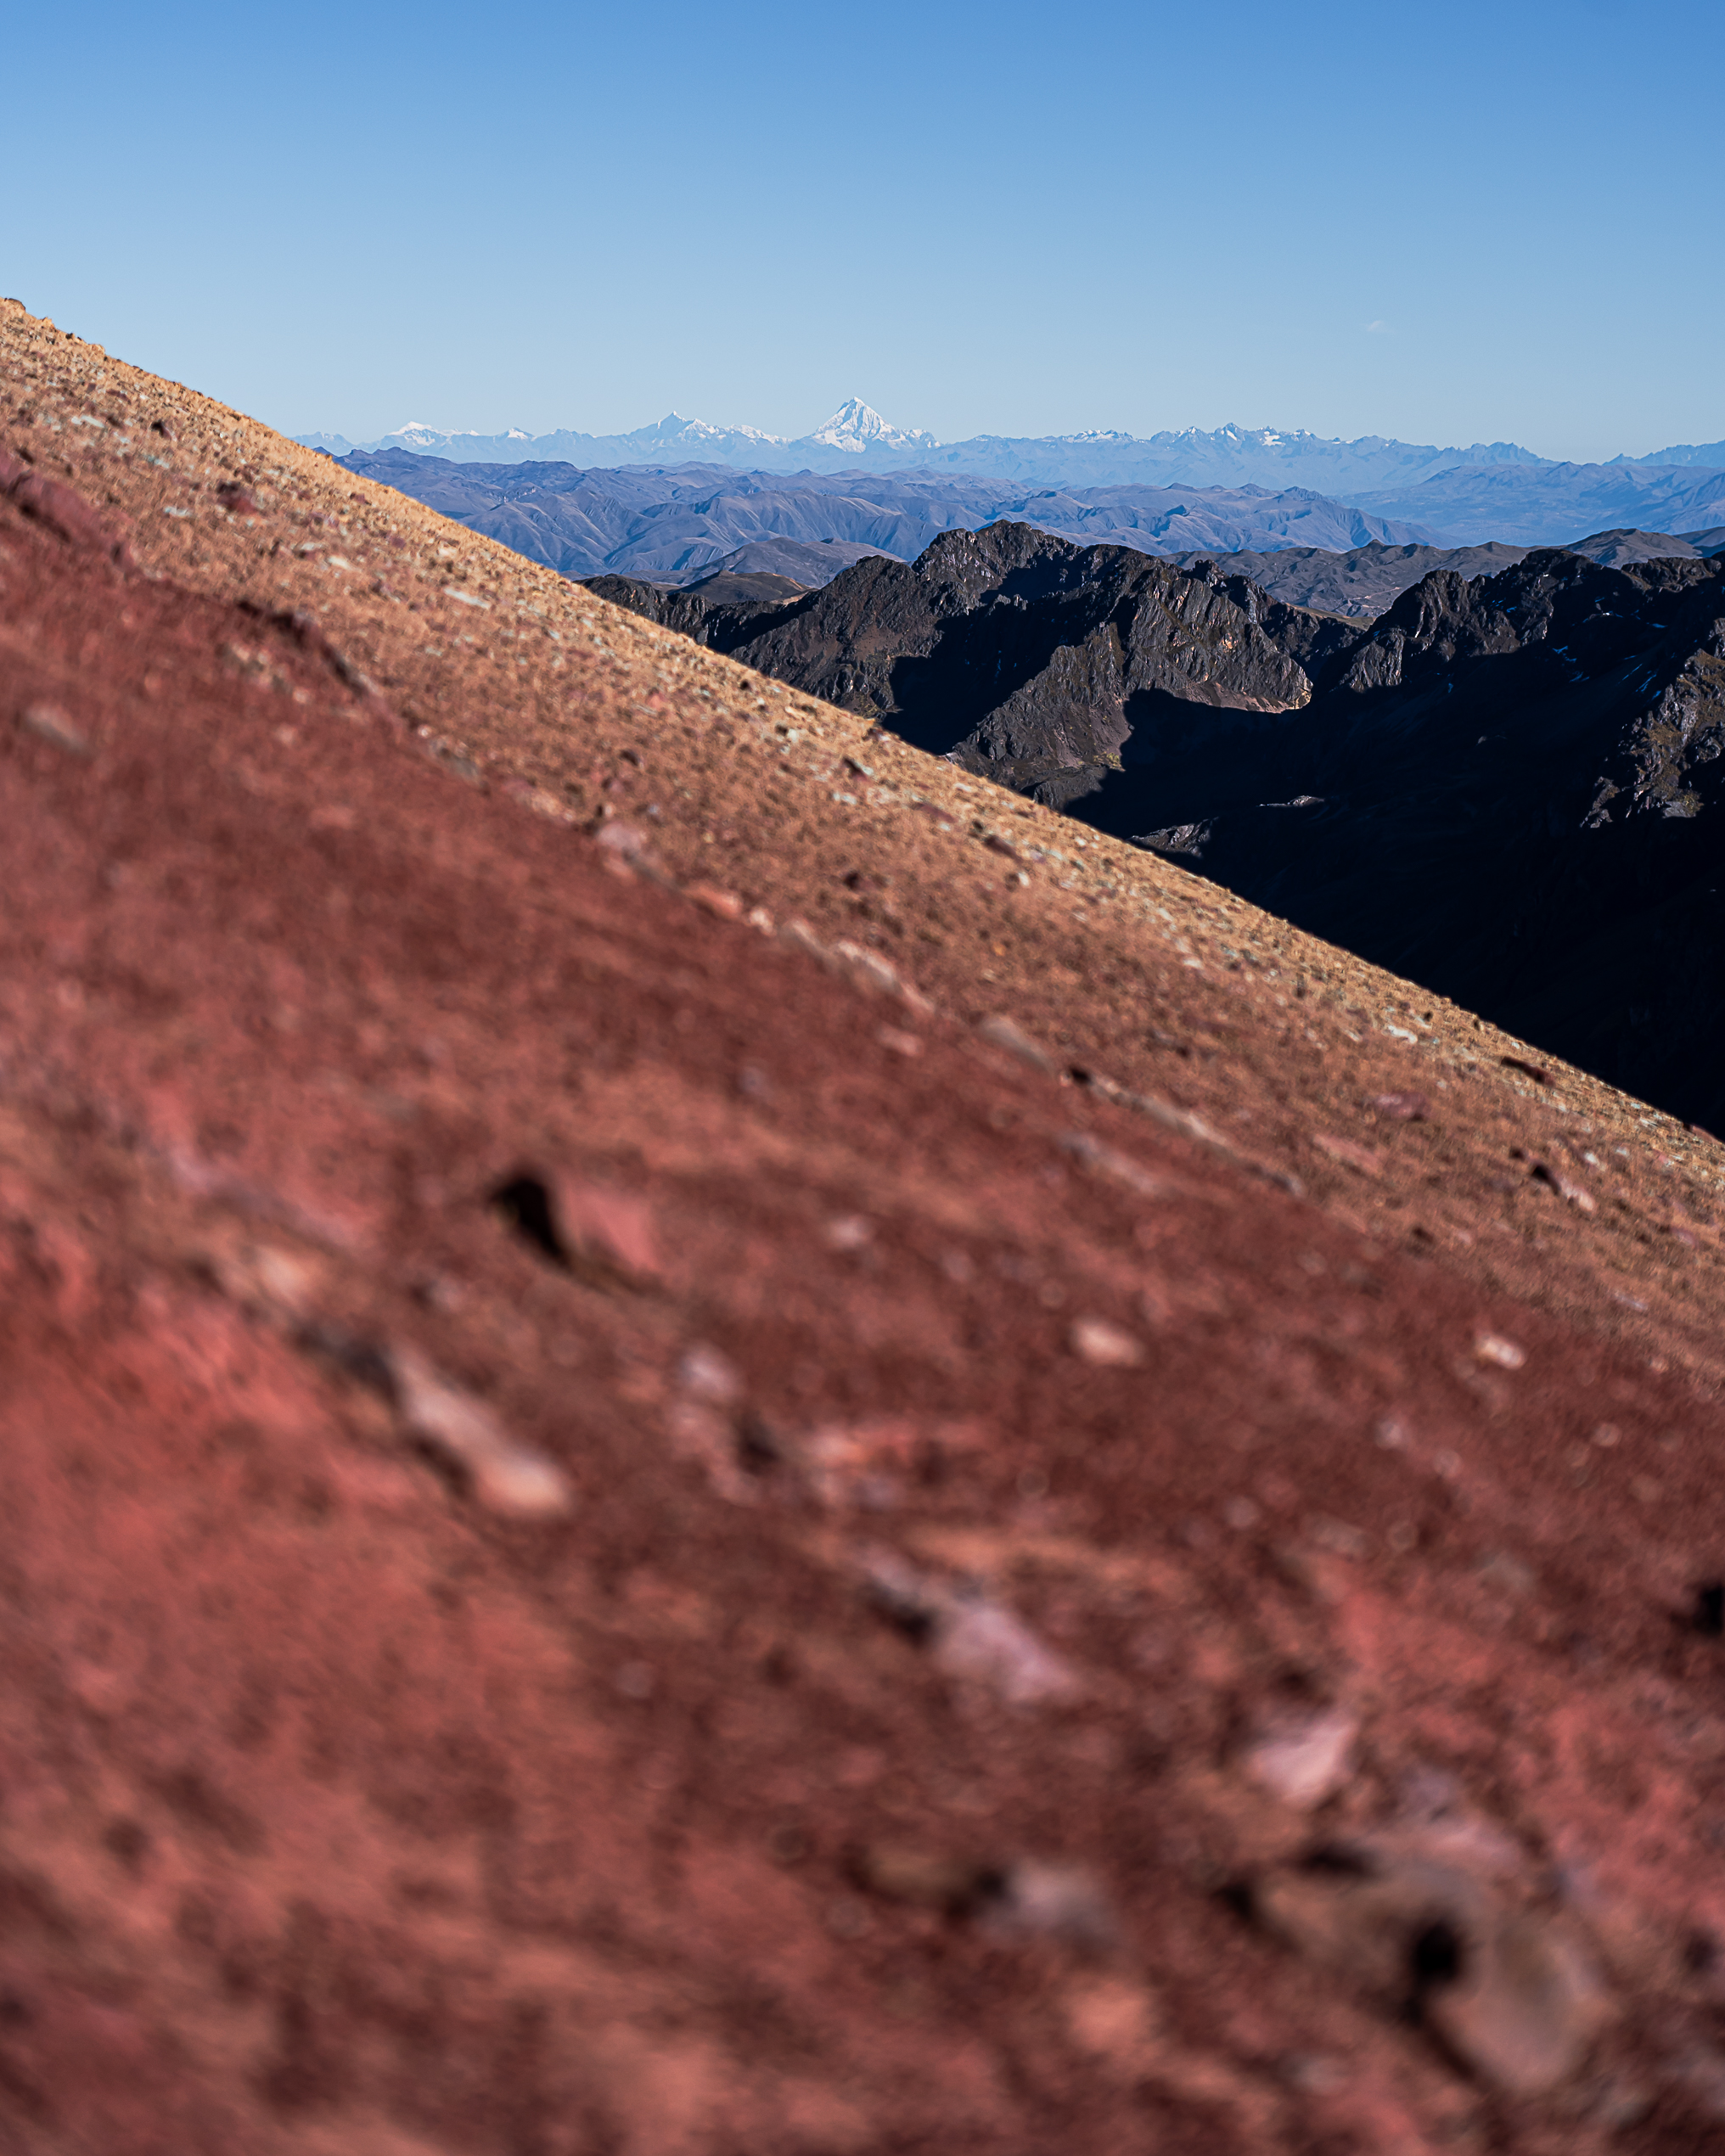
We leave around 7:30 a.m. when the sun gradually rises over the mountains and lakes. During the first climb, we stop at a beautiful place to take photos! An elevated view of several lakes of different colors and the Ausangate summit. One of the most beautiful viewpoints of this magnificent hike around Cusco. We continue to the Puca Cocha summit (4,990 m) where we have a 360° view of the valleys. On one side the snowy summit of Ausangate, on the other side a red valley. We continue our way in this red valley. Very different landscapes compared to what we saw the day before. At the end of the descent, we arrive at a campsite. Our guide asks us if we want to stop here and leave earlier tomorrow morning, or if we want to continue. Unanimously, we decide to continue because it’s still early. We climb to the Abra Warmisaya summit (4,985 m). I’m starting to feel tired, and my legs feel heavy. But I’m not giving up, I’m going at my own pace with several stops. We’ve magnificent views of the snow-capped peaks all along. At the top, we see a mountain of several colors, but not the one we’ll see the next day. Seeing this geological formation in different colors is quite unique! We continue the Ausangate trek until arriving at our camp located at 4,900 m above sea level in the middle of the afternoon. After lunch, some go up to the Rainbow Mountain for the sunset, but I prefer to rest to be in good shape the next day. The sunset at this place remains super beautiful!
To view the third day of the Ausangate trek, click here.
DAY 4: 6.16 km - 228 m elevation gain
SUNRISE AT THE RAINBOW MOUNTAIN
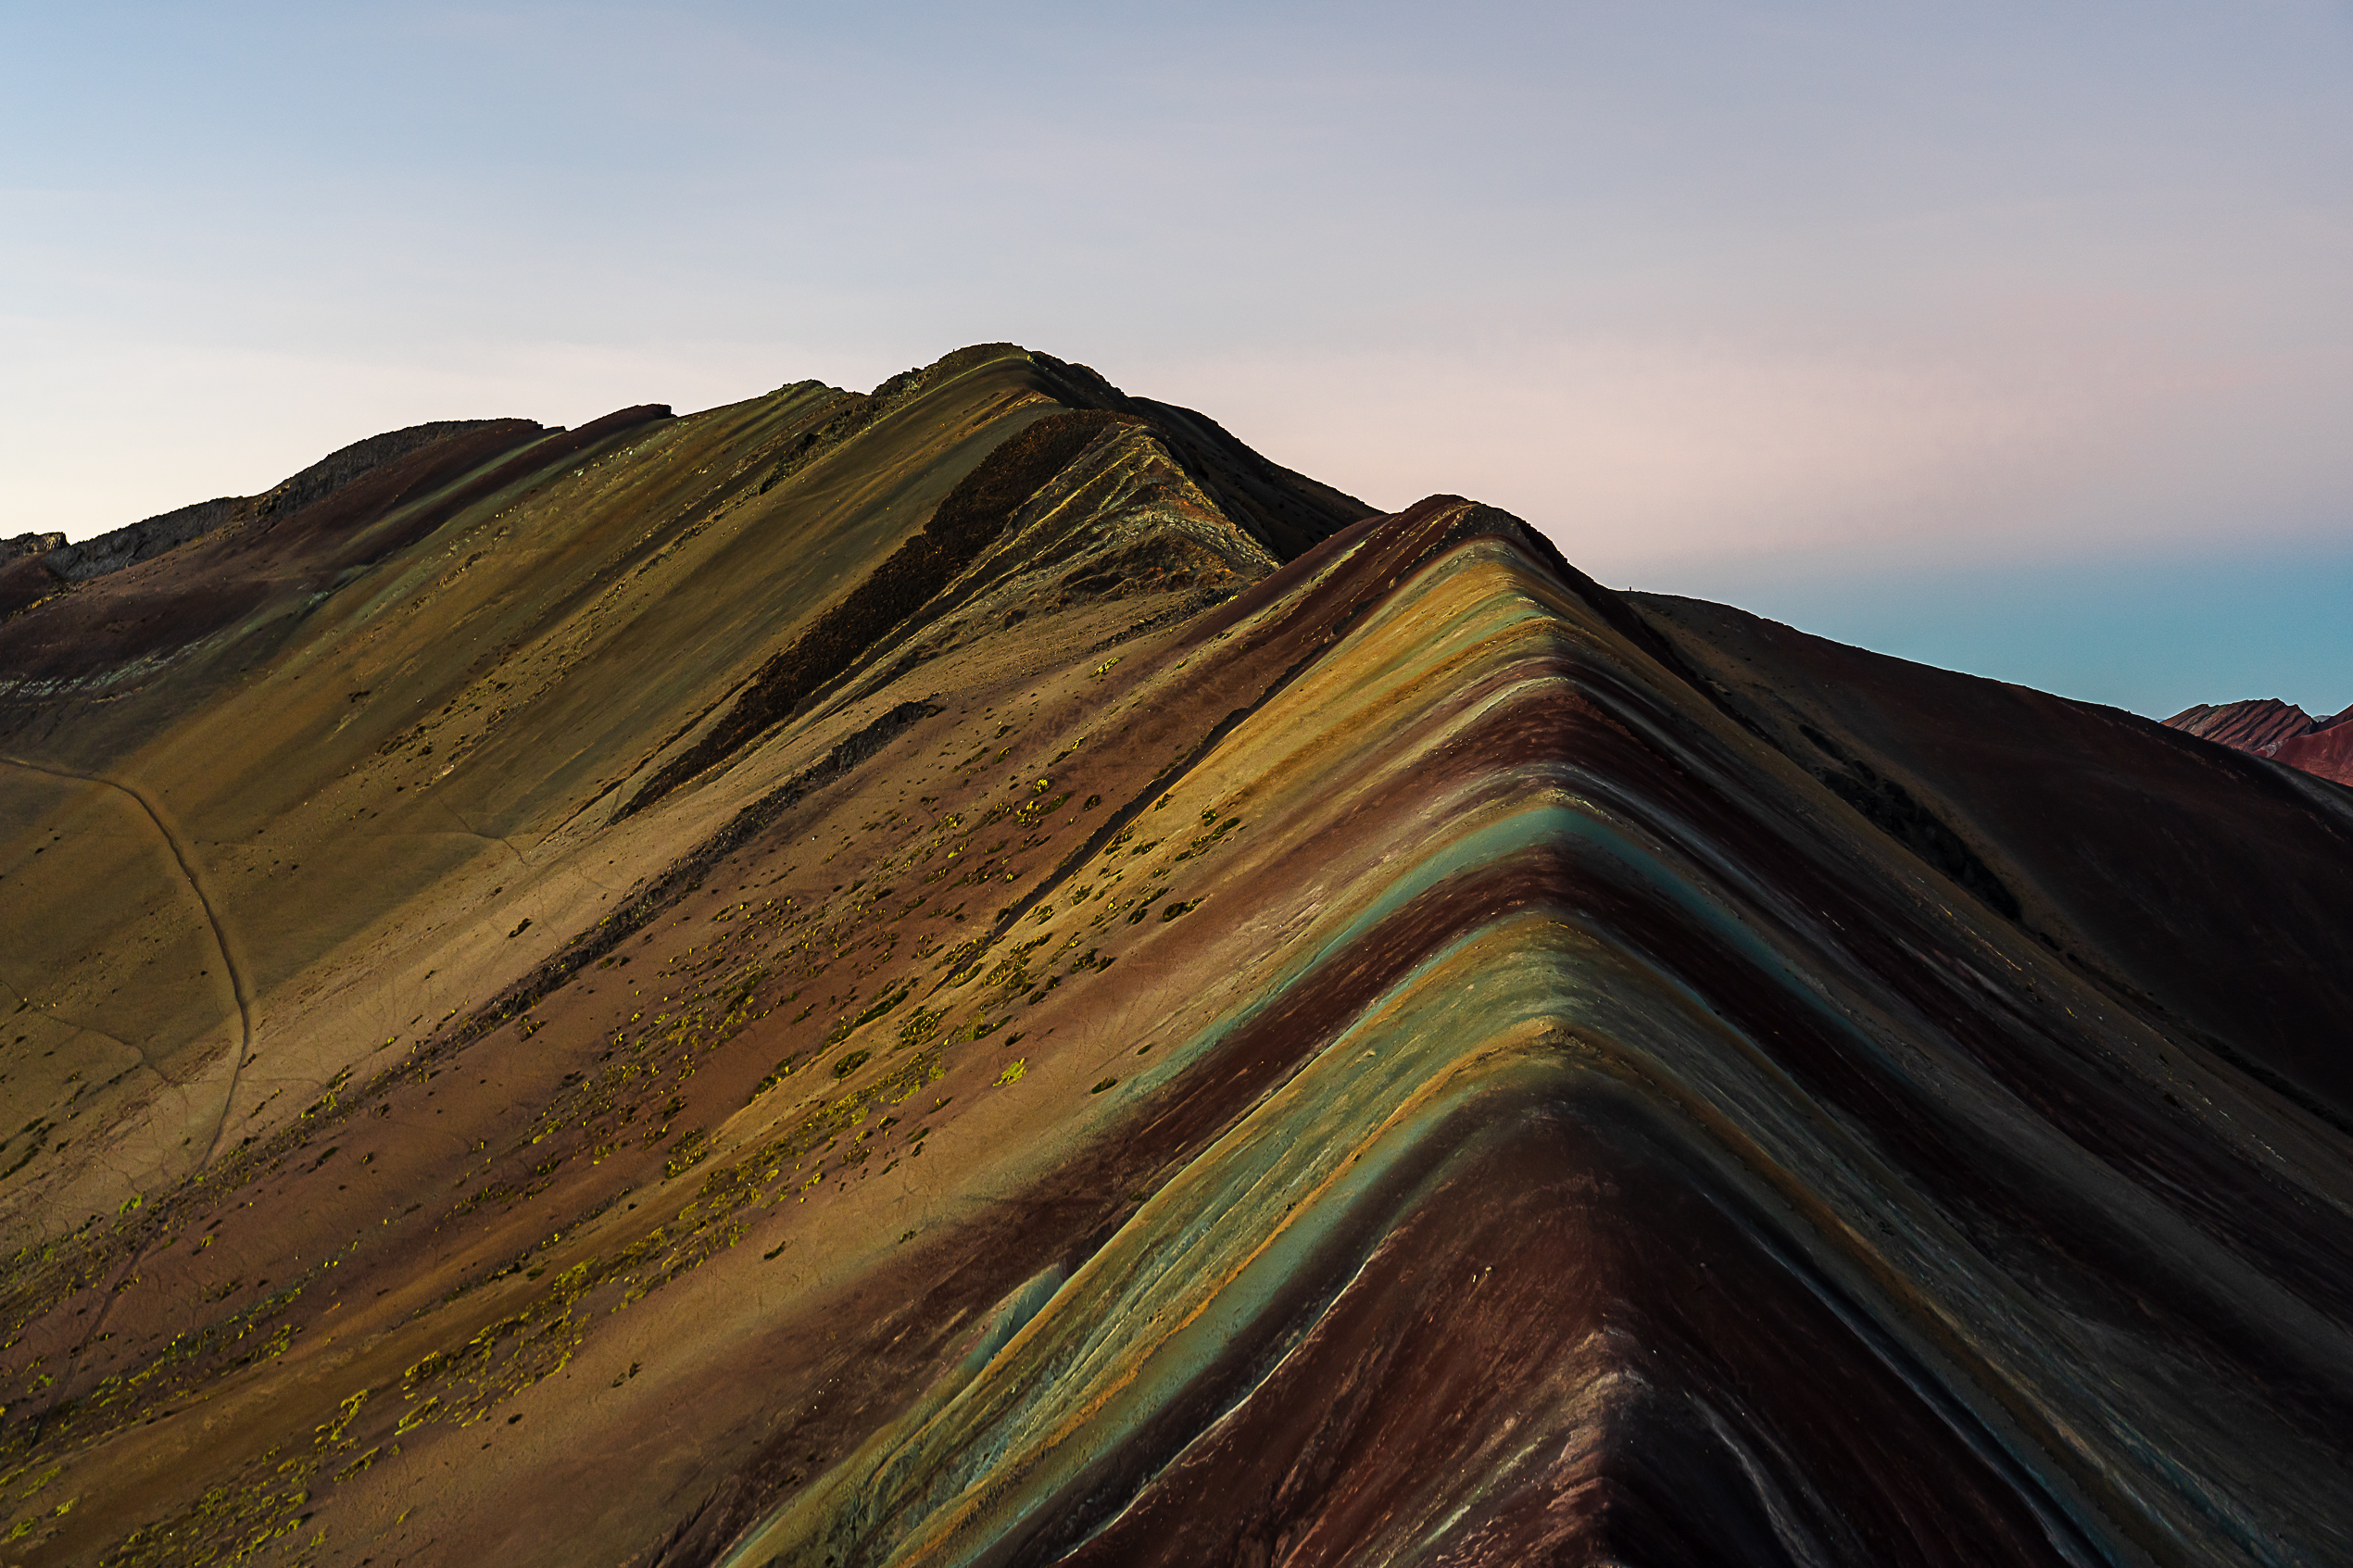
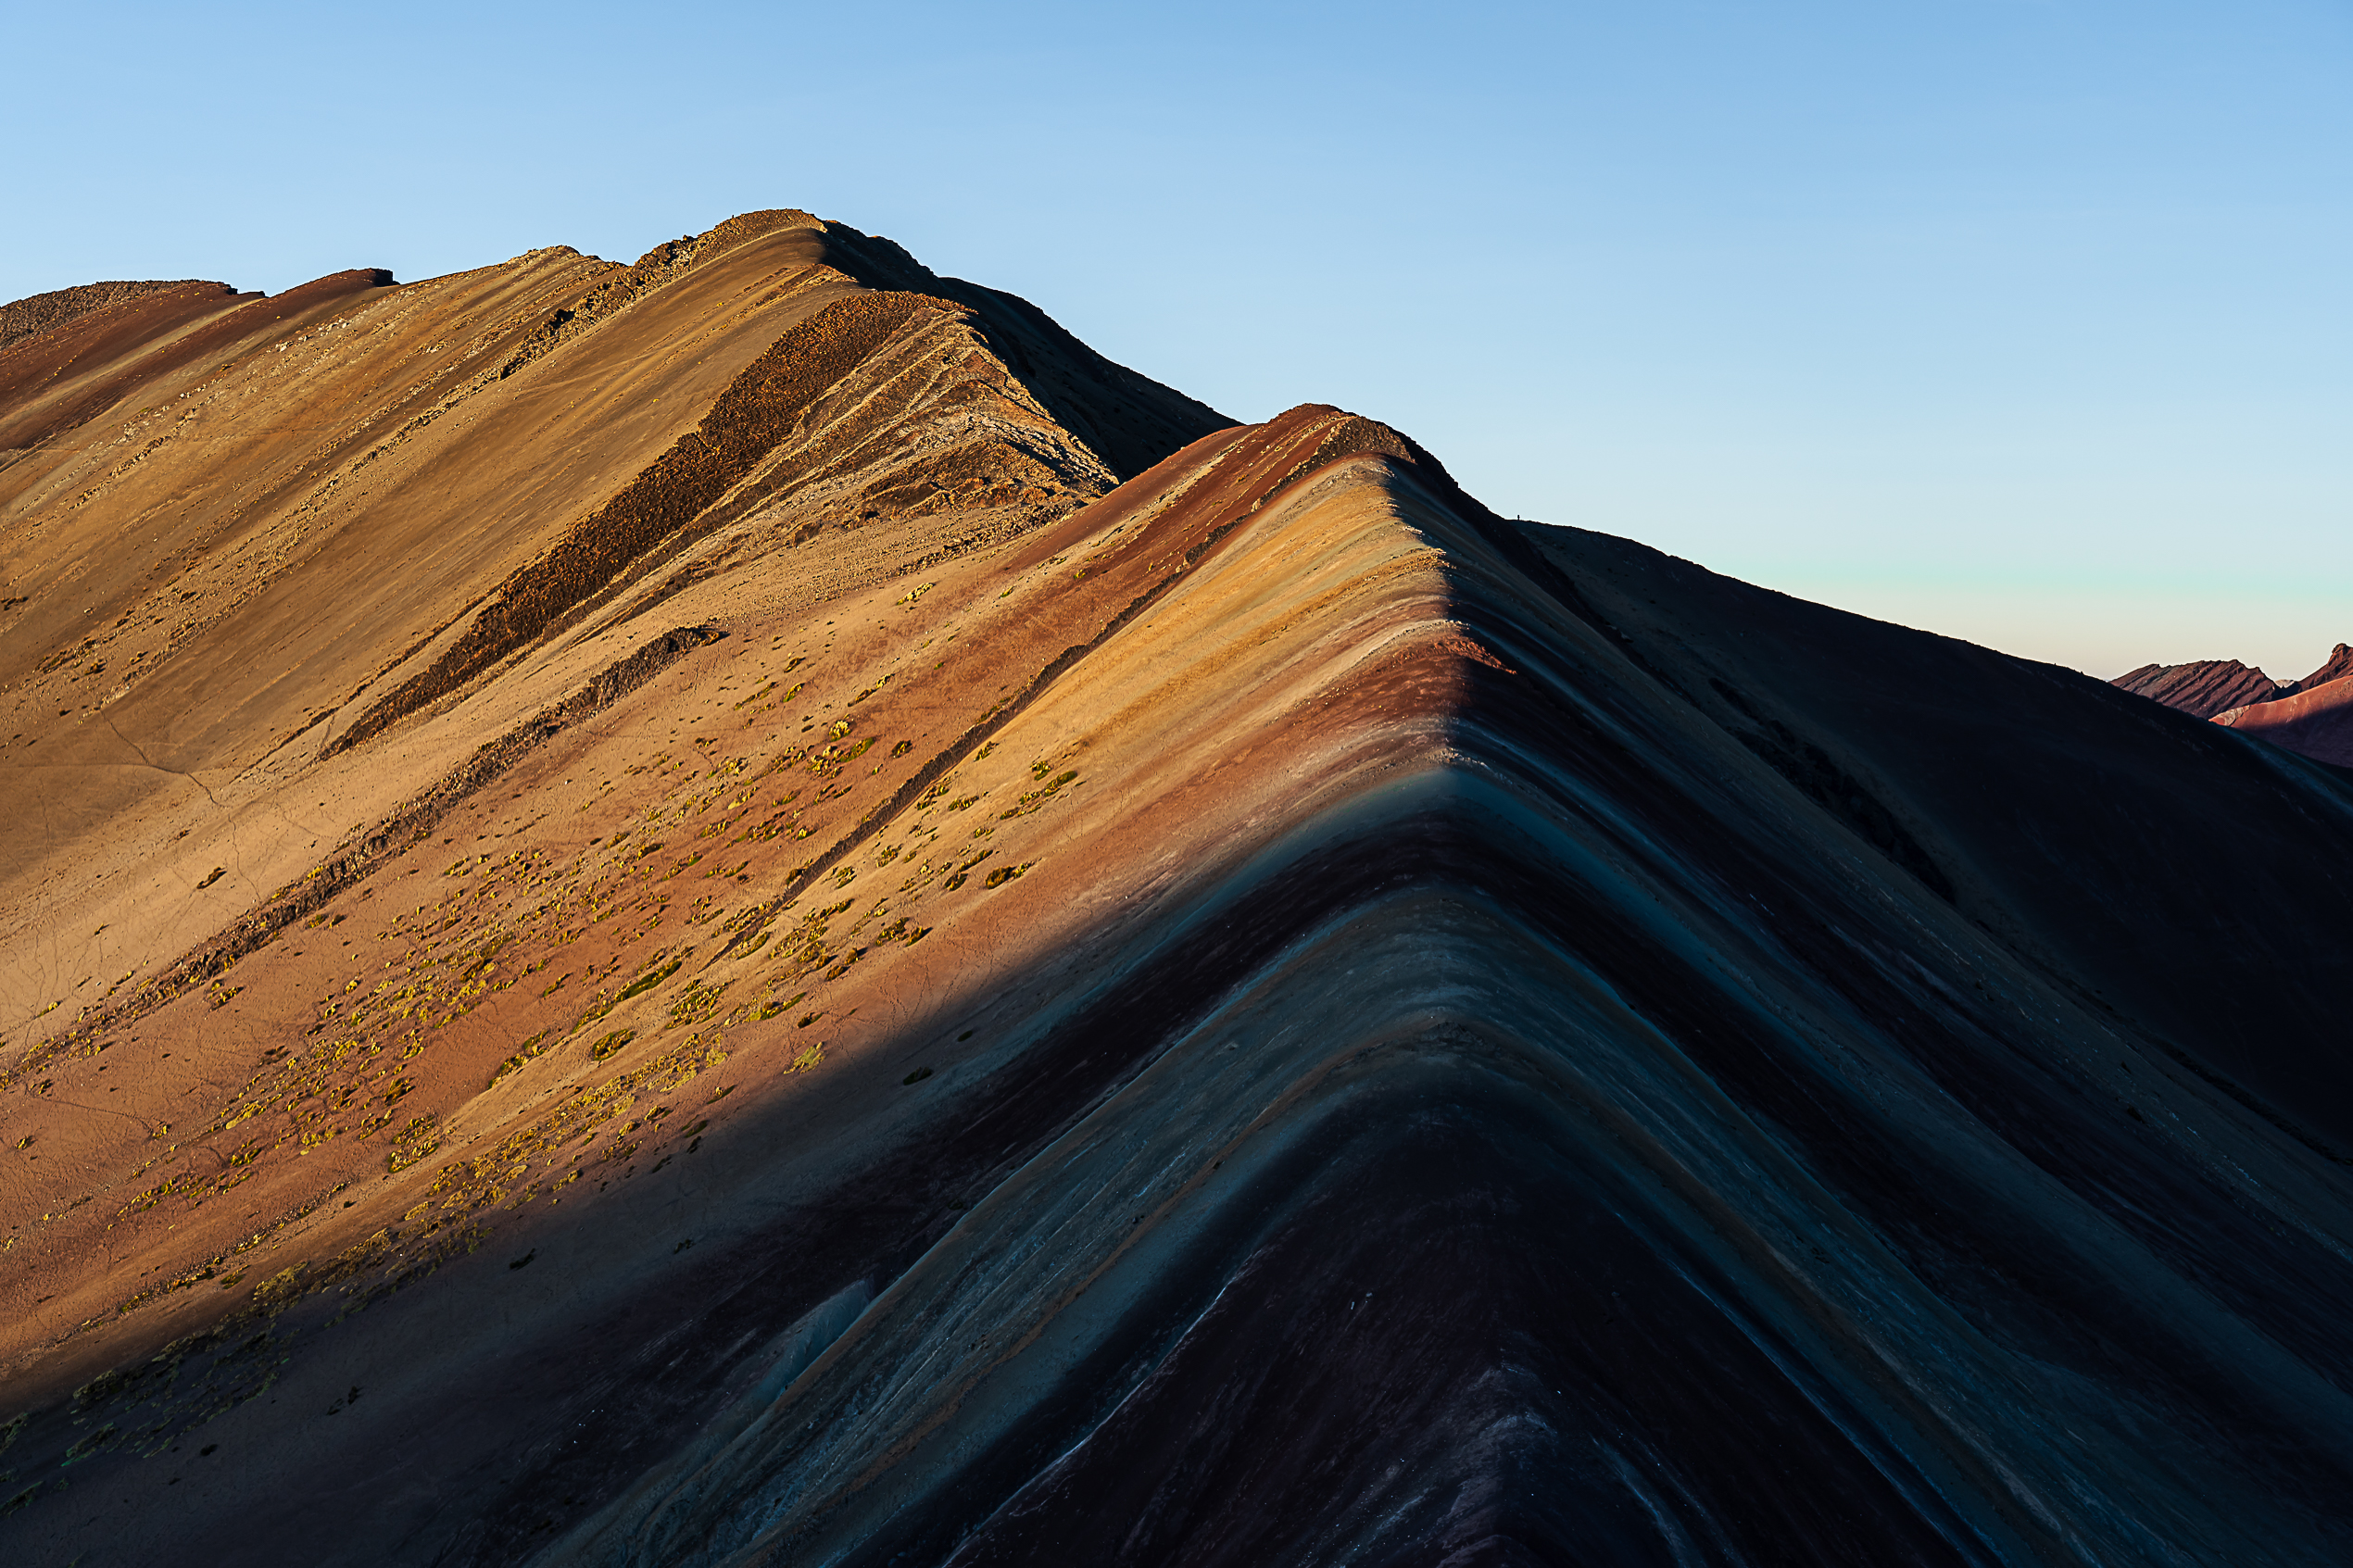
Let’s go to the end point of this beautiful hike around Cusco, the sunrise at the rainbow mountain, Vinicunca. Wake up at 4:30 a.m. for a departure at 5:10 a.m. after a very cool night. To give you an example, the liquid from my lenses froze in the small box… As the whole group didn’t necessarily want to see the sunrise, we separated to meet up later. We arrive at the summit a little before 6am. We slept really close to the place.
And there, a great natural spectacle awaits us! A mountain with multiple colors that intensify more and more with the rays of the sun. A purple sky over this mountain! The view’s just incredible! And what a joy to be able to enjoy this place alone! Yes, yes, you read correctly… We were the only ones in front of this famous mountain. Such a pleasure to be able to enjoy this beauty while being able to take our time, and in peace… Just for this moment, I’m so happy to have done the Ausangate trek. The best view’s from the top of the hill facing this mountain. It’s only a few meters of ascent.
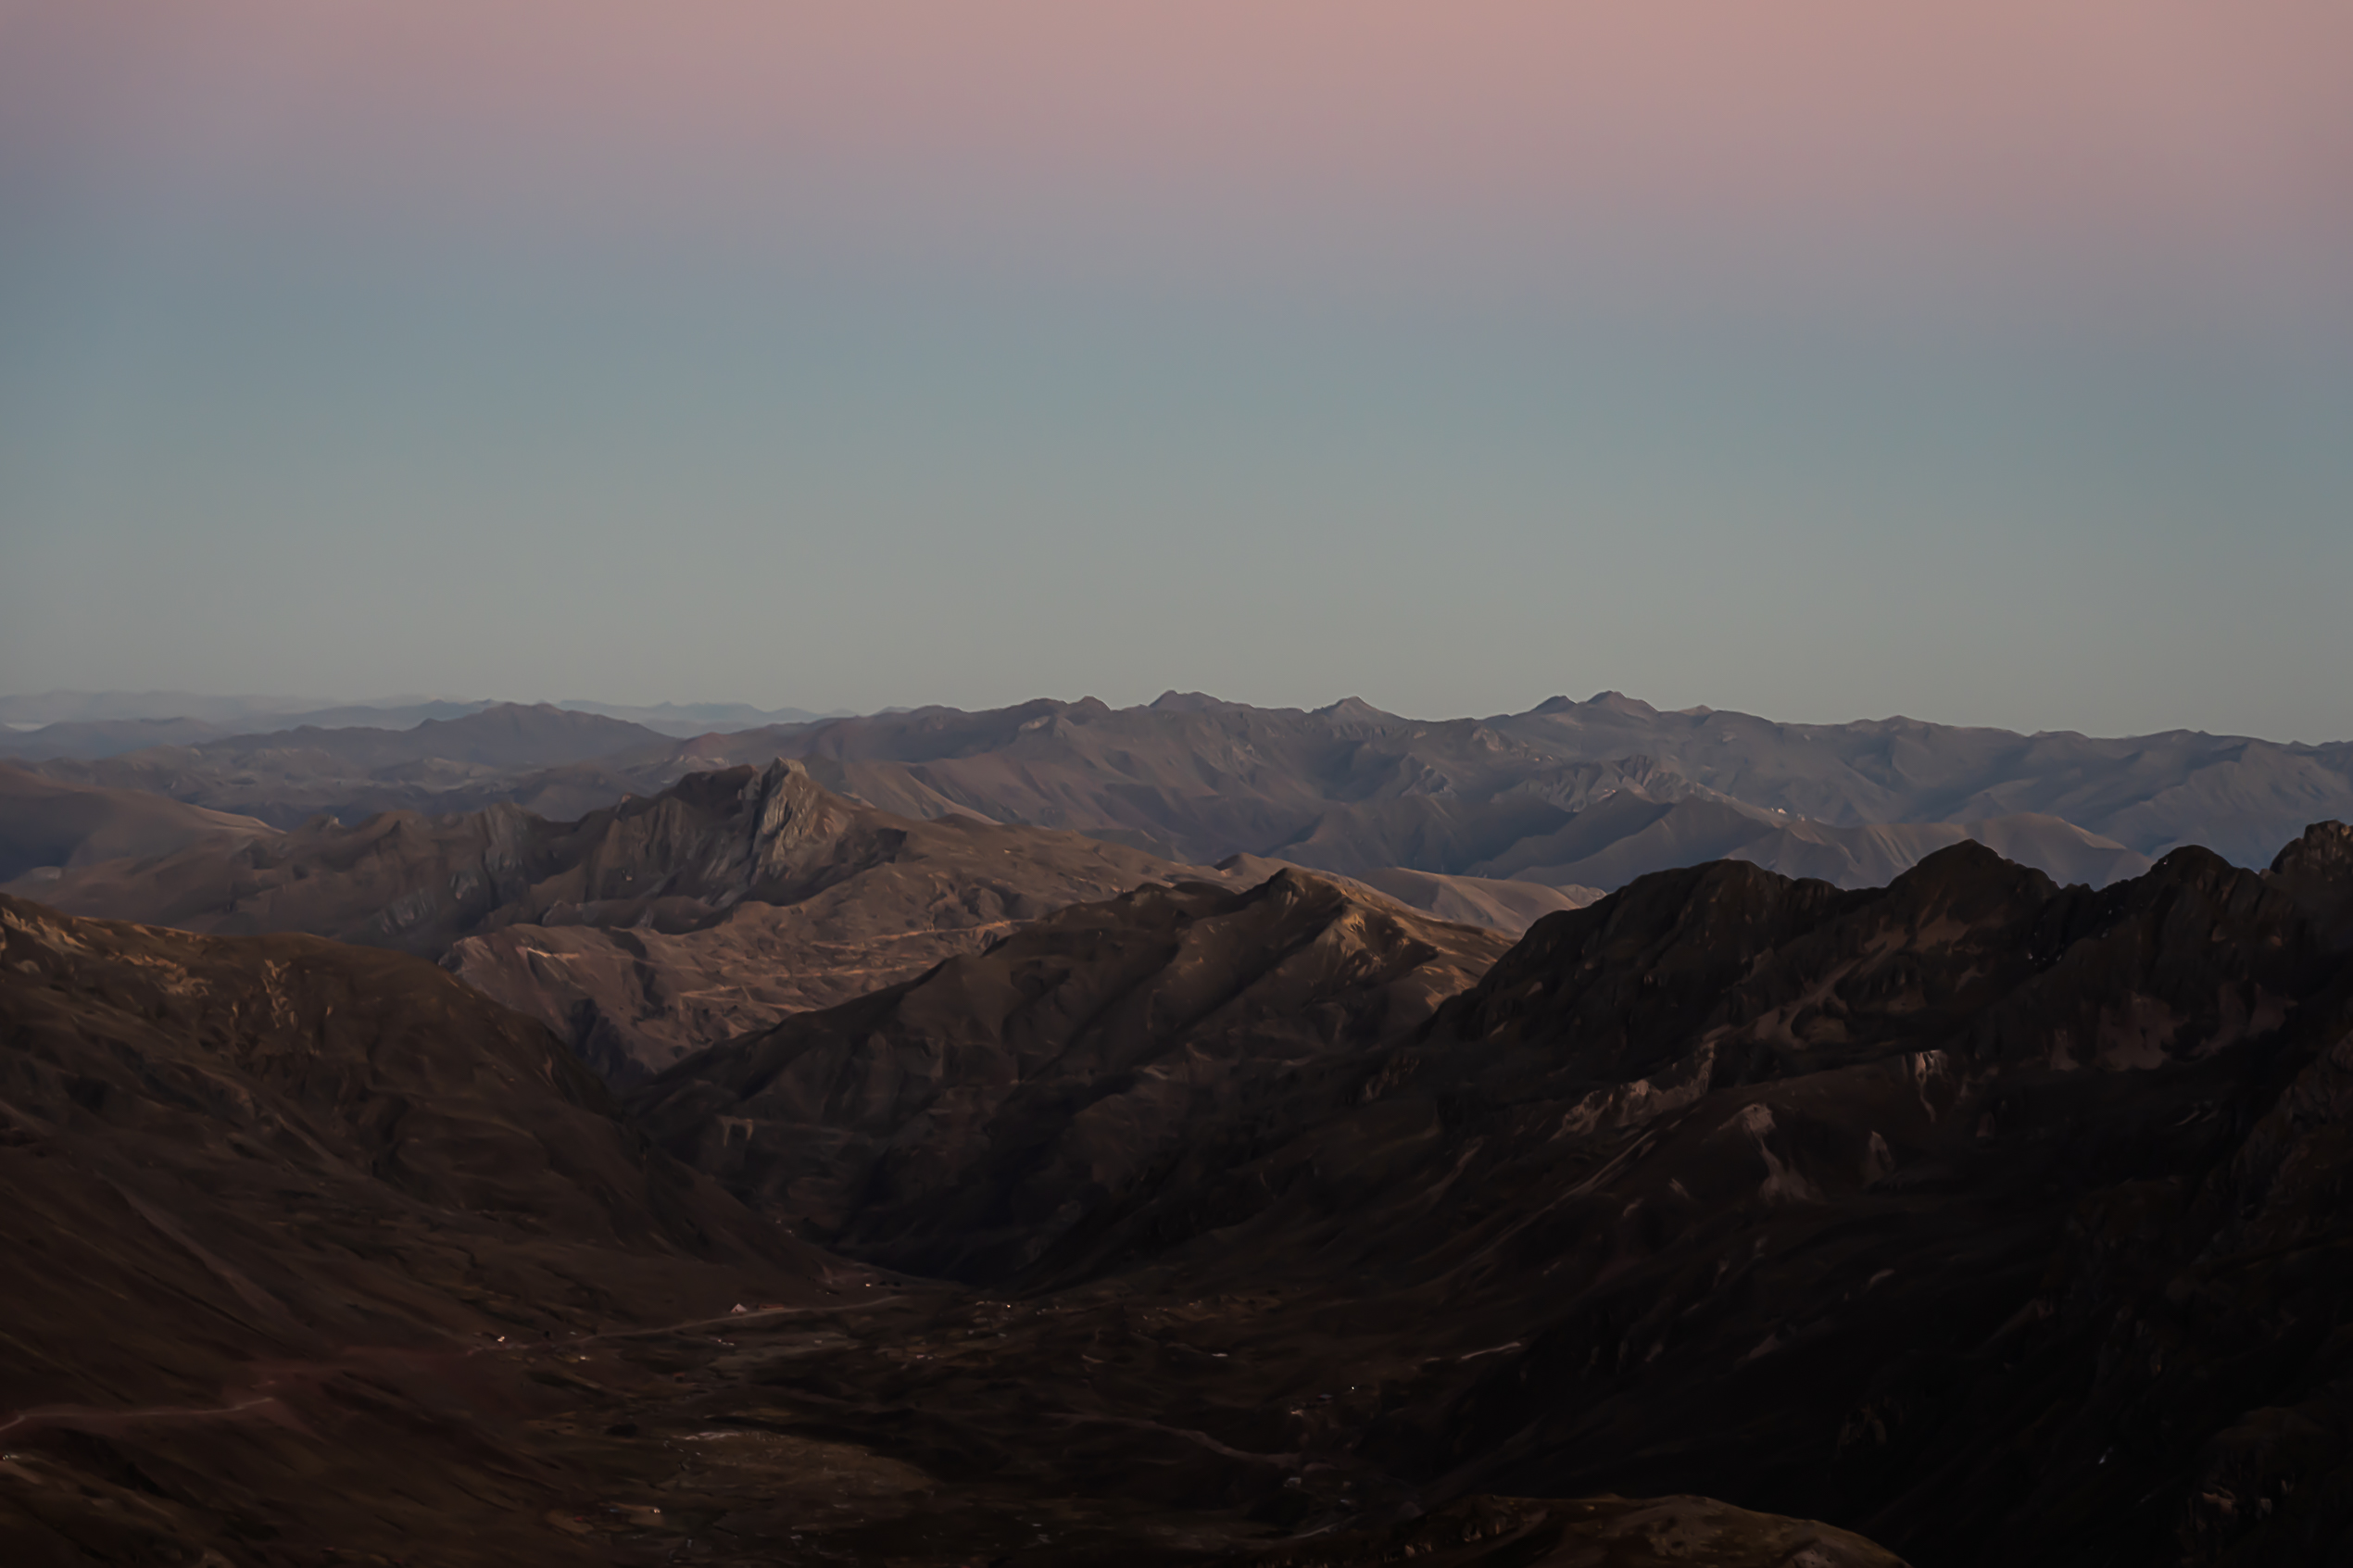
After several minutes of observation in the cold, we continue on our right. We take a path that few people do, to get to the red valley, Valle Rojo. This is a step that I recommend if you’re in good physical condition and have the time. A magnificent view of a very red valley with a little green. It’s very beautiful! I think the photos illustrate my words well. Then, we go back down a good slope to catch up with the path that everyone takes to go to and back from the rainbow mountain. And seeing the world, while it’s still early in the morning, I’m so glad I was there during sunrise!
To view the map of the last day of the Ausangate trek, click here.
CONCLUSION OF THE AUSANGATE TREK
A magnificent trek! Every day was incredible, every view was breathtaking! This hike in Peru is part of my top 3 in the country. The immensity of Ausangate is extraordinary… The hike’s really not easy. The elevation changes are quite significant! In addition to being in good physical condition, you must tolerate the altitude.
Regarding the AB Expeditions agency, I’ve nothing to complain about. The food was excellent, the guide adapted very well to the group’s desires by offering several alternatives. He also took care of us when we started to feel altitude sickness. The locations chosen for sleeping were perfect, everyone was very attentive! Even if I did this trek in partnership with the agency, I give you a very honest opinion, you’ll find great value for money!
THE PRACTICAL MAP OF THE AUSANGATE TREK
HOW MANY DAYS DOES IT TAKE TO DO THE AUSANGATE TREK?
There are different options for doing the Ausangate trek to the Rainbow Mountain. Either you tour the Ausangate peaks and it will take you about a week. Either you only do part towards the Rainbow Mountain and it will take you between 3 and 4 days. Having suffered from altitude sickness in Bolivia, I didn’t want to try the experience of doing it independently in case of problems. So I decided to do it with an agency. Unfortunately being in low season in Cusco, and the trek being little known, I had a lot of difficulty finding an agency that was going. I was finally able to do it in 4 days in collaboration with AB Expeditions.
WHEN TO DO THE AUSANGATE TREK?
Conditions are ideal between May and August to do the Ausangate trek. Even though temperatures are low, especially at night, there are few rainy days, so good conditions for using the trails.
| JANUARY | In the middle of the rainy season, the trails can be slippery. |
| FEBRUARY | Just like January, the rainy season is in full swing, there may be several days of rain. |
| MARCH | Rainy days deThe rainy days are decreasing, it’s the end of the rainy season. |
| APRIL | Still a few days of rain but temperatures are moderate. |
| MAY | The start of the dry season with cool temperatures. |
| JUNE | In the middle of the dry season, temperatures are cool, especially at night, but very few rainy days. |
| JULY | Few rainy days, temperatures are low at night. |
| AUGUST | It’s still the dry season but the temperatures are milder. |
| SEPTEMBER | The start of the rainy season with temperatures still quite cool. |
| OCTOBER | Rainy days increase, trails can become slippery. |
| NOVEMBER | In the middle of the rainy season with moderate temperatures. |
| DECEMBER | In the middle of the rainy season with moderate temperatures. |
WHAT BUDGET TO EXPECT TO DO THE AUSANGATE TREK?
The budget indicated below is that of a backpacker who goes with an agency that is a little more luxurious than what he would normally use. To be expected because as I specified earlier in this article, if you go in low season and you want to do it with an agency, you may not have much choice.
- Accommodation: You must allow one night before the start of the excursion. I advise you to plan 2 nights afterwards too if you’ve time, especially to rest, or plan the next hike/destination. There are inexpensive hostels, around PLN 30*, in the city center.
- Food: Everything’s included in the excursion, except the last dinner on return.
- Transport: The agency picks you up in front of your accommodation and also drops you off there.
- Activities: The excursion with accommodation, transport, food, guide, entries cost US$490*.
In total, count on a budget of around PLN 2,300* for the excursion. Doing it independently will cost you less, but the service I got is worth the price.
MY TRAVEL TIPS TO DO THE AUSANGATE TREK
- Prepare your equipment well to do the Ausangate trek. Depending on when you go, it can get very cold at night.
- Acclimate to the altitude for several days in Cusco before heading out to hike. You will be at 5,200m.
- If you’ve little experience or are alone, take the excursion with an agency or someone who has experience.
*Prices are updated from July 2023.